
Does anyone else have a weird relationship with jewelry?
I mean, it’s cool. It’s classic. Almost all of the older women in your life are super into it. But there’s still just something about it that’s always been a little tricky, if you ask me.
The cheap stuff these days isn’t really all that cheap. Finding the right piece can take a lifetime. AND when it comes to traveling, it’s hard not to worry that it will all meet an unfortunate demise of pulverization in your suitcase! Regardless if it’s the TSA’s “fault” or not…
But – there’s no denying it IS a killer way to elevate almost any outfit. So that’s what has always made me want to find a way to make it work.
Enter: TRIM. Something you may or may not be familiar with, although get ready, ‘cause it’s about to become your new best friend! Mainly due to the fact it’s inexpensive, customizable AND totally manageable for any DIYer – no matter how well you do (or don’t) know your way around a needle and thread.
Amazing, right?
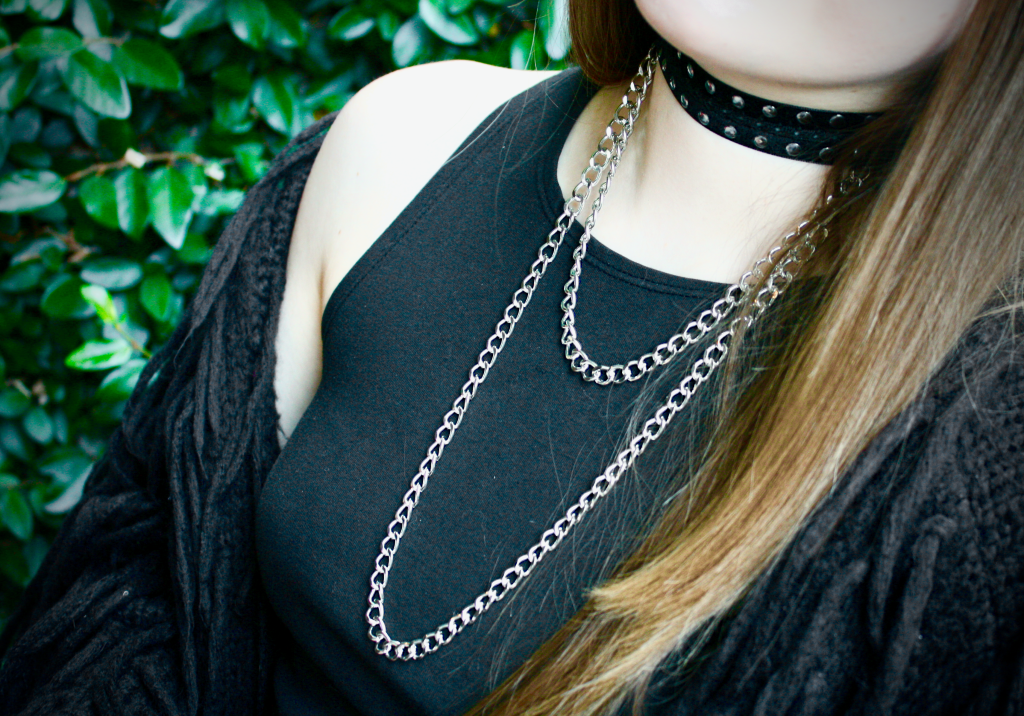
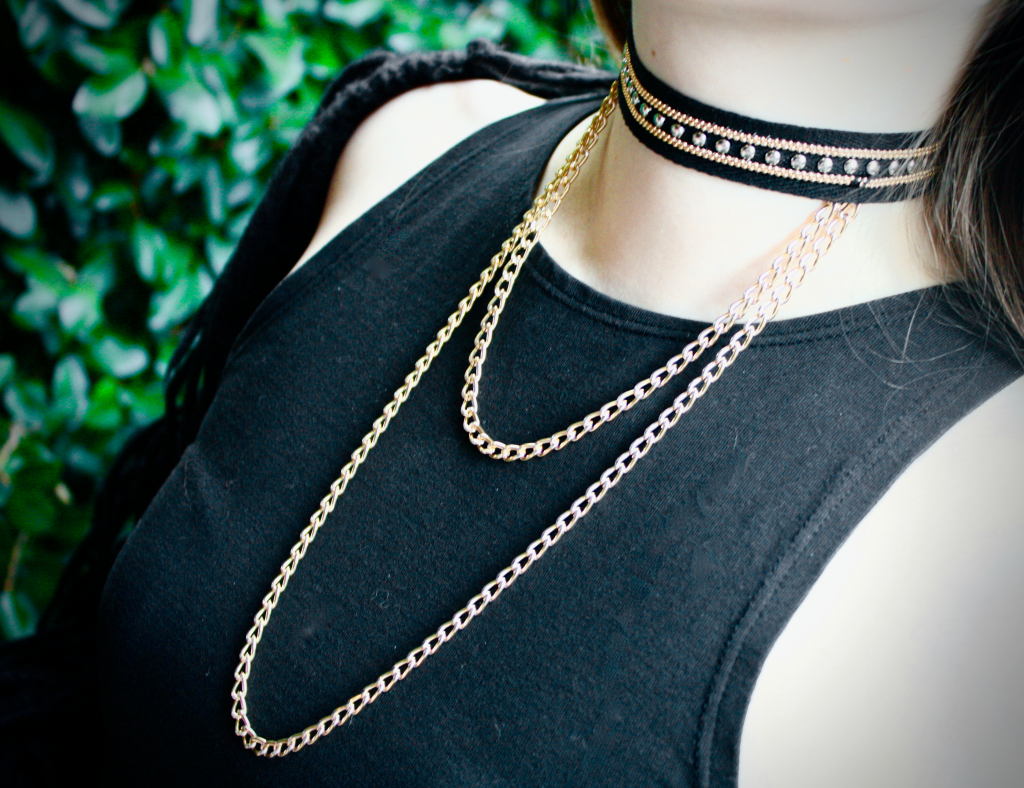
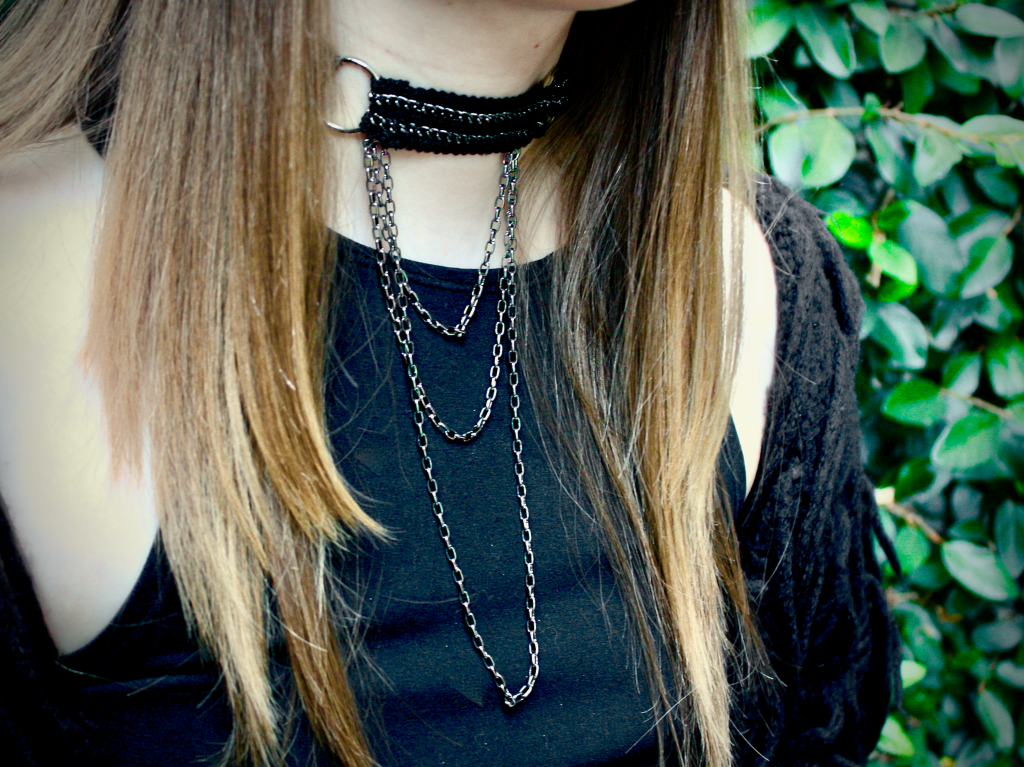
Another perk is that by using trim, you can design the necklace however intricate or basic you please. Break it up with additional jump rings to create a cool look – or keep it super simple yet chic and edgy with the choker alone. But either way, you can throw it around without having to think t w i c e.
Seriously! Suitcase, gym bag, purse—it’s all NO match for this mighty accessorizing hack.
So let’s jump into it!
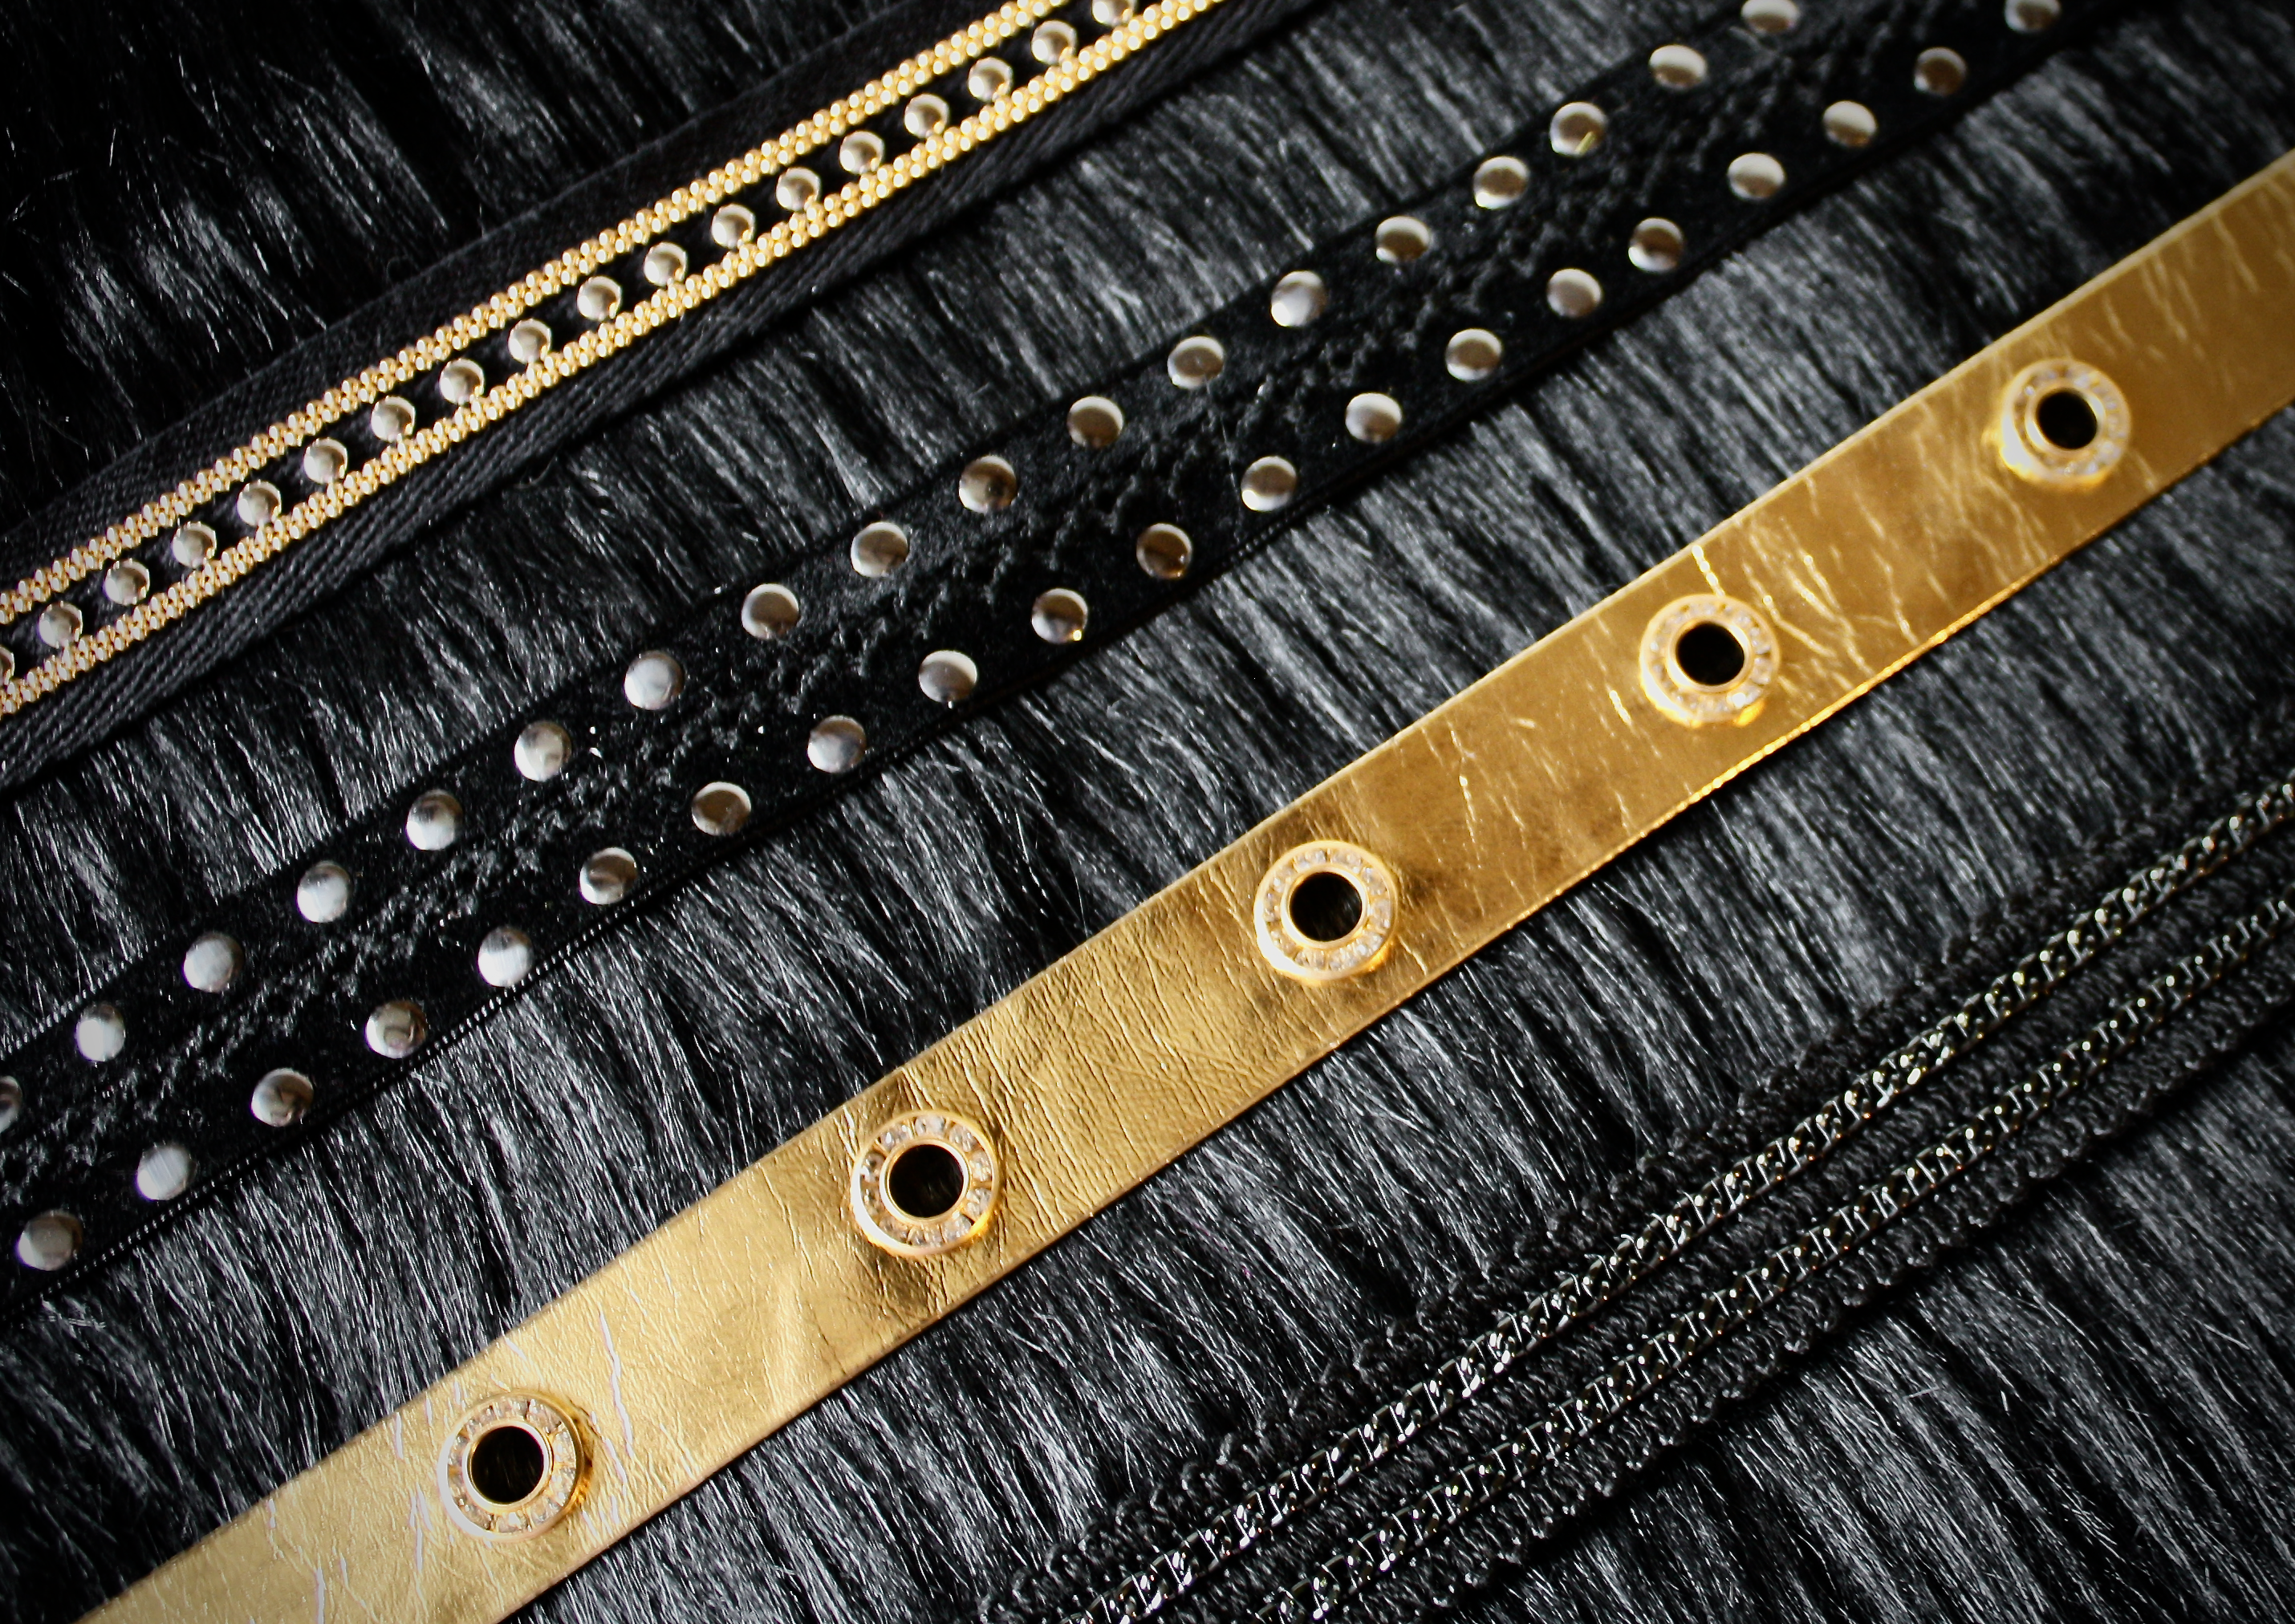
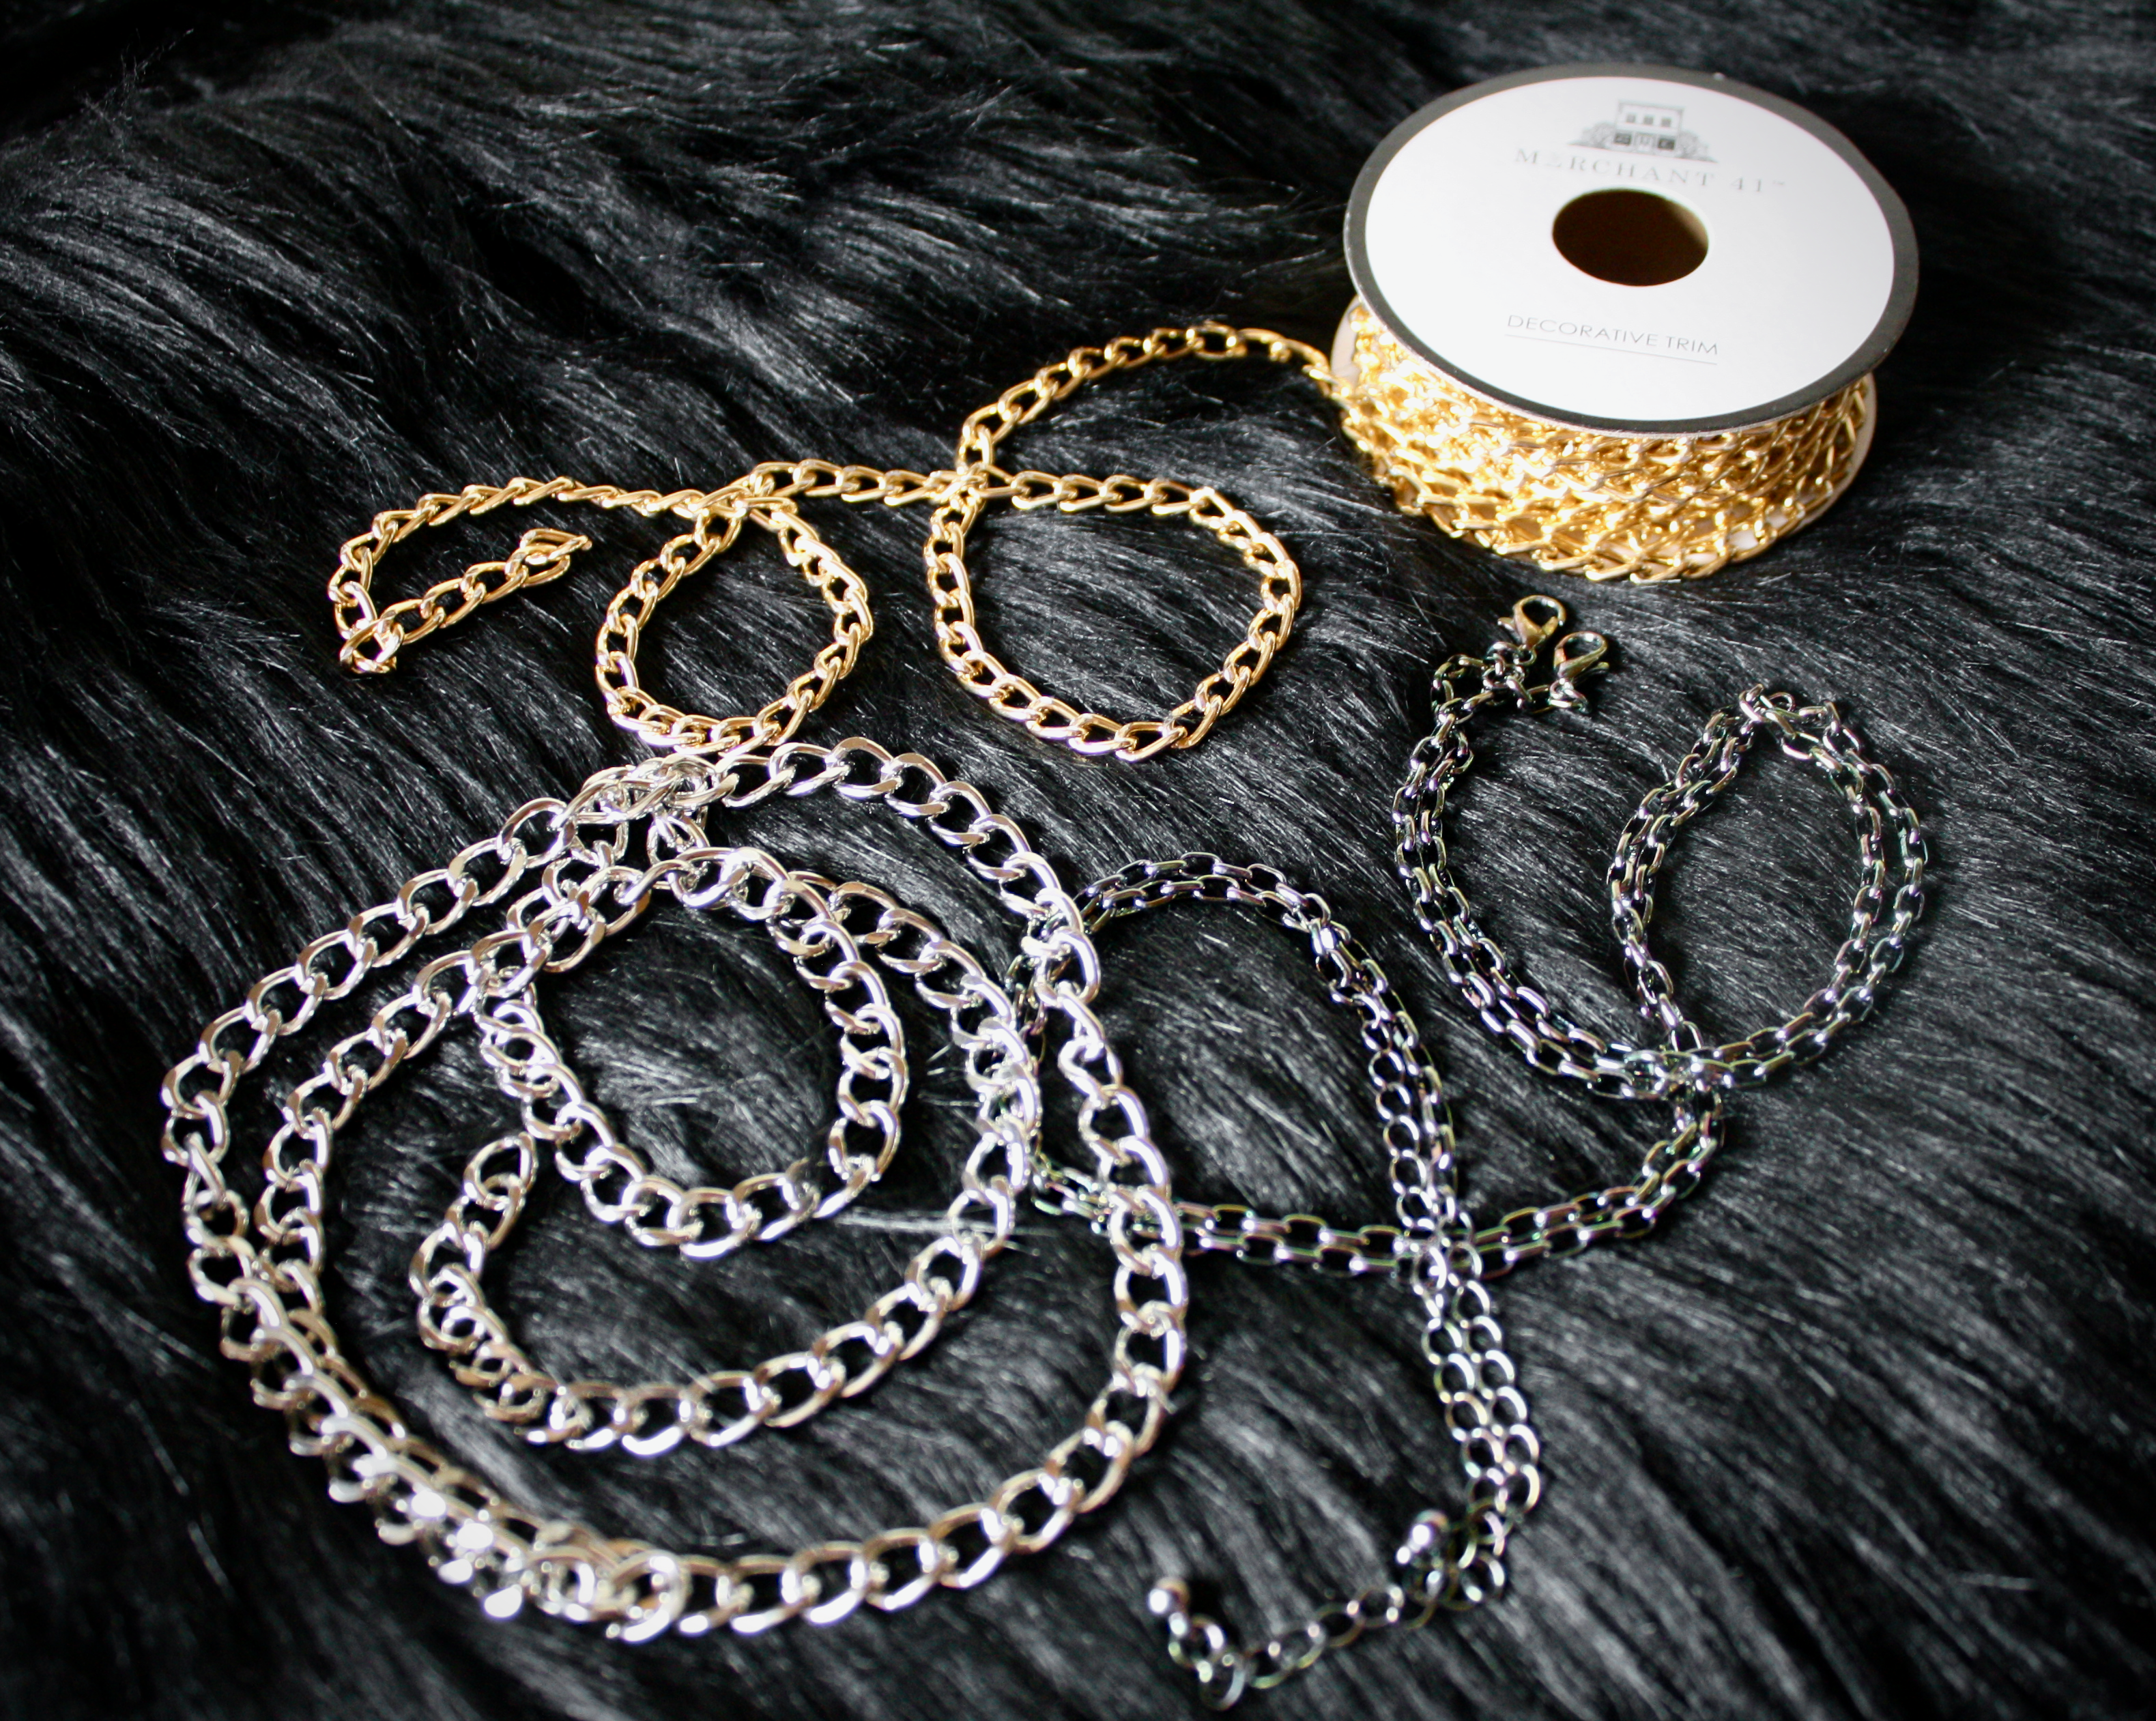
// WHAT YOU NEED //
+ A piece of trim
+ Curb chain
+ Needle & thread
+ Your choice of closure (I use a hook & eye)
// STEPS //
++ Measure the amount of trim you need based on your neck size, leaving 1/4 to 1/2 inch extra on each end. Remember, you want it to fit like a choker without, you know, actually choking you.
++ Take one end of the trim, fold the extra section back and sew it down to create a neat, fray-free edge. If your trim has a lot of metal embellishment like mine, you’ll probably need to hand sew it; however, if you want to use a sewing machine to zig-zag stitch it instead, be my guest!
++ Repeat on the other end, then double check that the finished length still comfortably fits your neck (i.e. didn’t accidentally get shortened too much in the process).
++ Take your choice of closure and hand sew a piece to each end.
++ Figure out how you want to position the curb chain, then hand-sew each end of it onto the back of the trim (but not too close to the bottom edge or else you run the risk of it sagging).
++ Voila! Enjoy your super-cute, new favorite accessory.


// PROTIPS //
++ Whenever hand sewing things like this, I almost always opt for button/craft or upholstery thread instead of regular all-purpose, because it has that nice extra dose of durability.
++ I personally like to use hook & eyes for necklaces because they feel the most secure to me, but you can totally use whatever works best for you! Snaps, velcro – even a safety pin can do the trick if sewing REALLY isn’t your forte & you want to spare the band-aids.
++ All in all, the most important thing is to keep measuring as you go, juuust to make sure it doesn’t end up being too small. If you want to be safe, always lean toward keeping the trim slightly longer than you need, since you can always stitch together a gathered section of it in the back to tighten the necklace at the very end. No one will ever see it – and your secret will always be safe with us.

Let us know how it turns out for you!
xxAA

Love this ! thank you x
LikeLike
Of course! Hope you have fun with them! xx
LikeLiked by 1 person