DIY STEAMPUNK-CHIC FAUX FUR SCARF

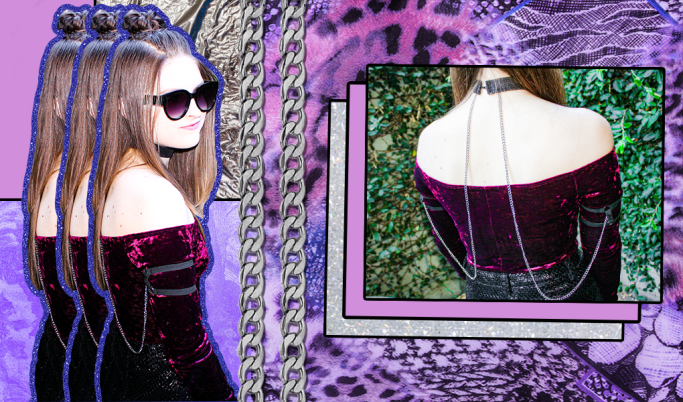
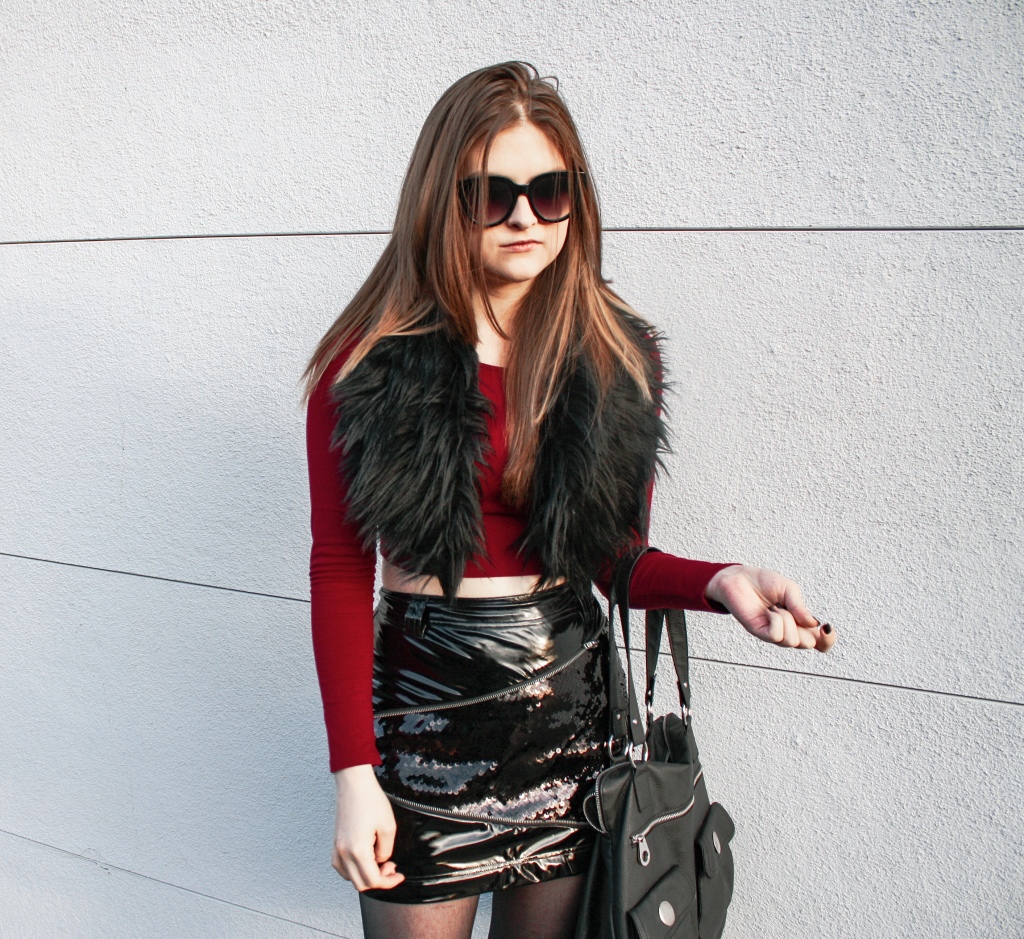
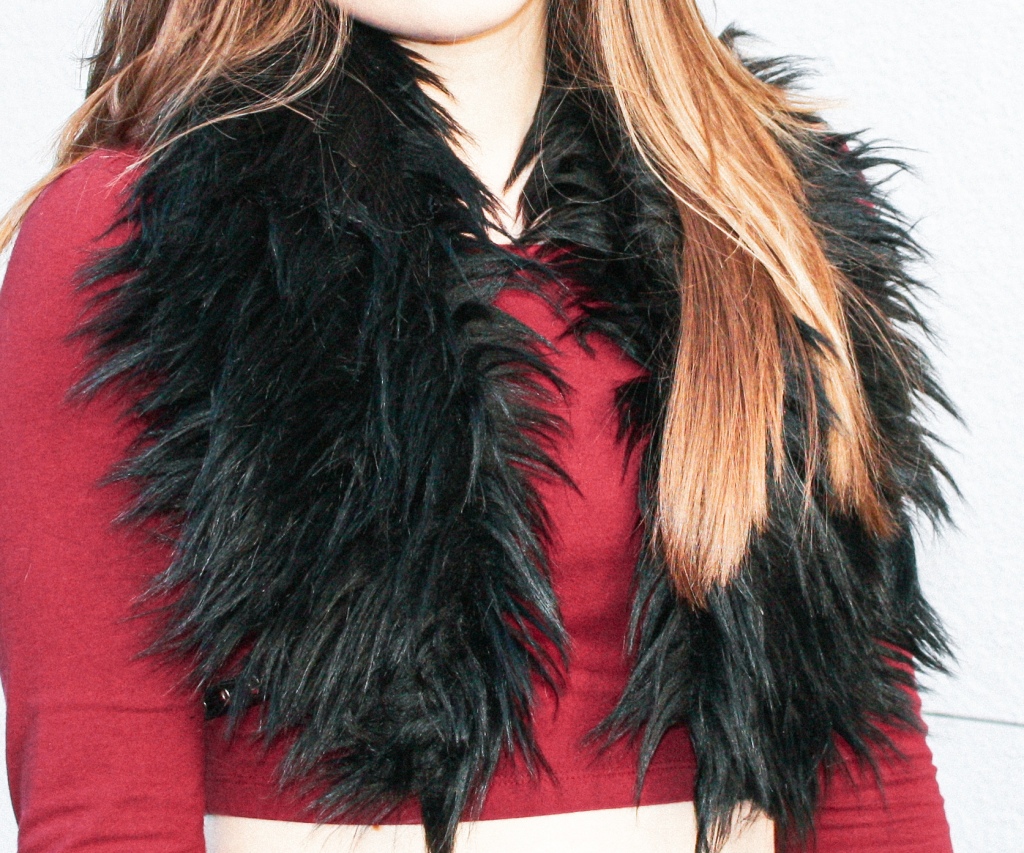
JON SNOW BUT MAKE IT FASHION

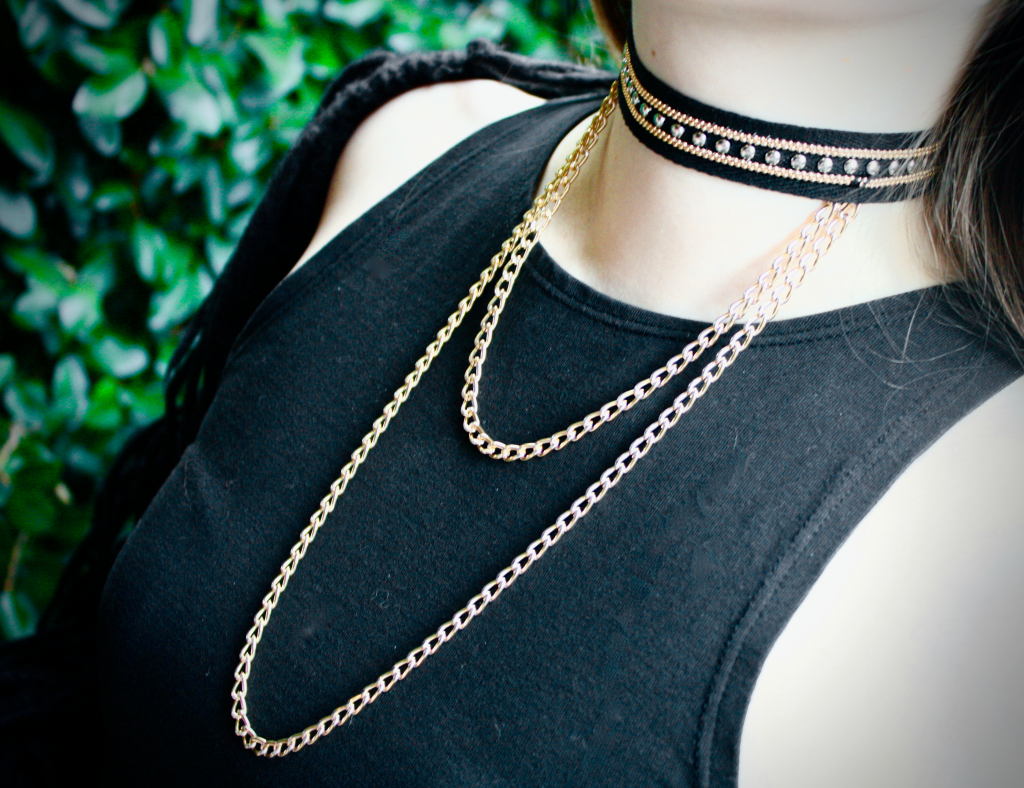
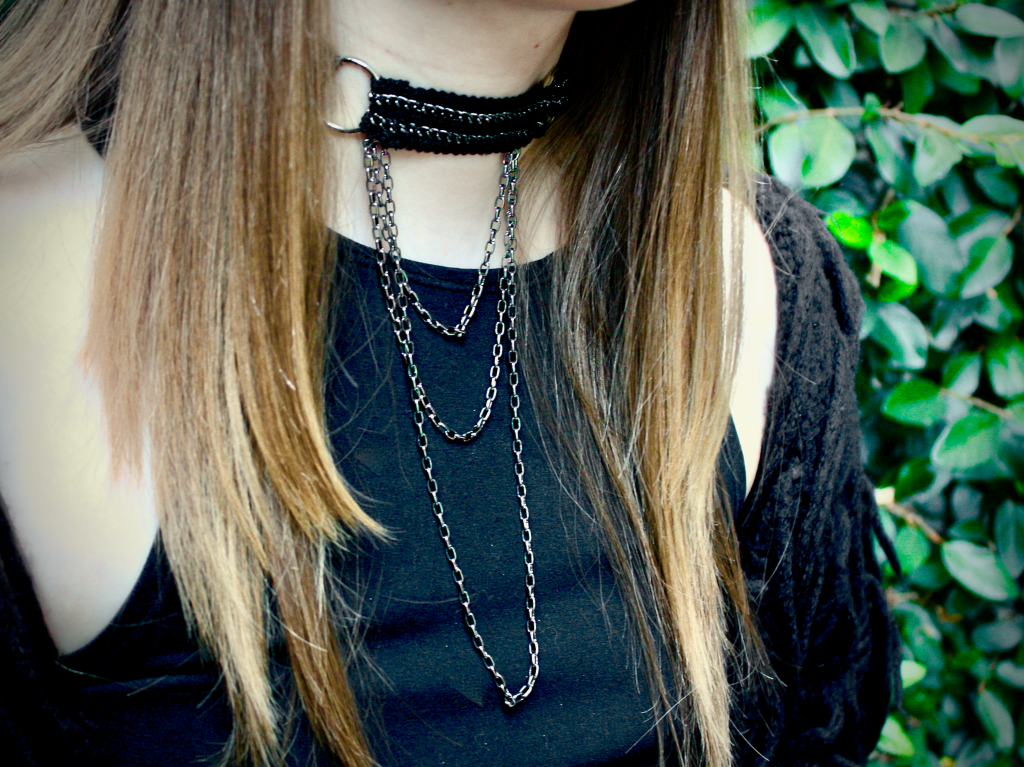
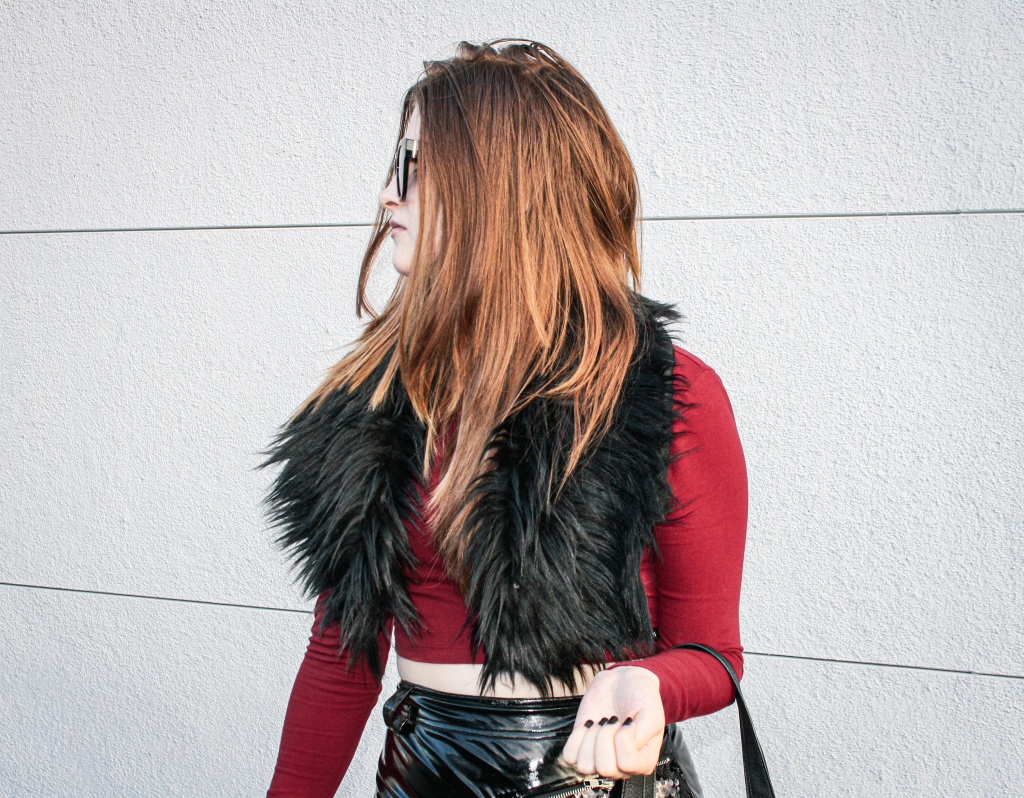
That’s the main idea I ran with for this latest accessory fresh off the line (read: my dining room table) for winter. It’s part scarf, part shawl – with a hint of steampunk, meets early 2000s Tripp pants, meets…those IKEA rug capes that Jon & his Night’s Watch bros donned over at The Wall in Game of Thrones.

Faux fur scarf

Perhaps a combo you never would have dreamed, but here we are! And it’s amazing.

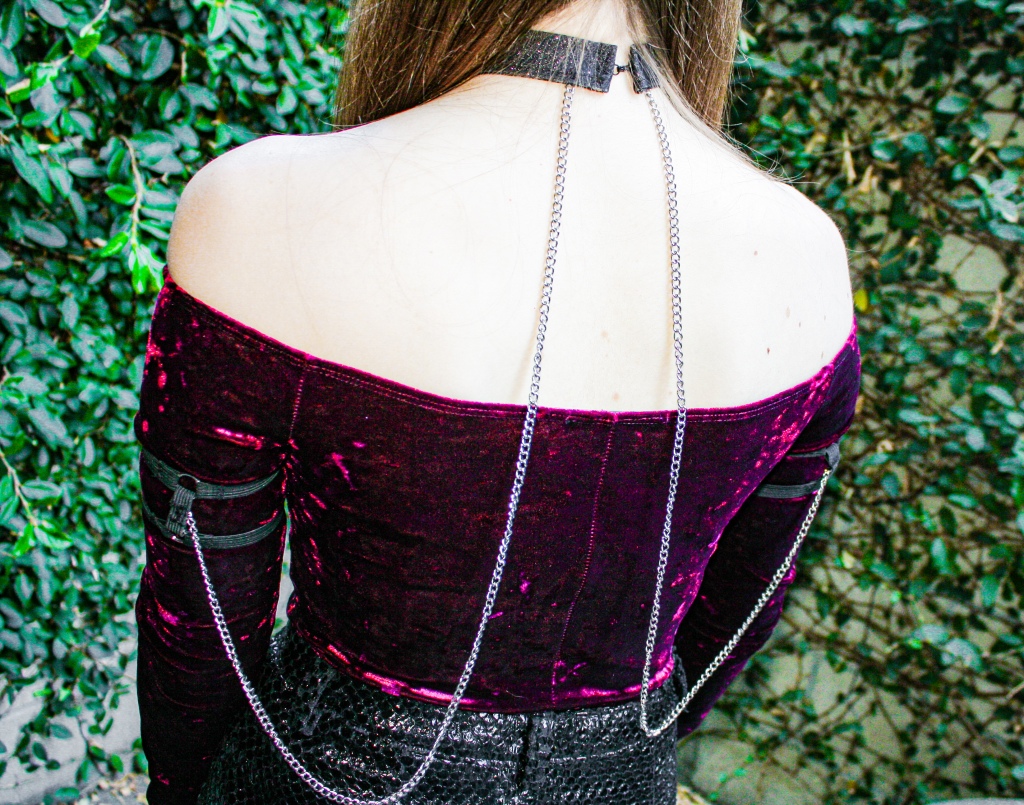
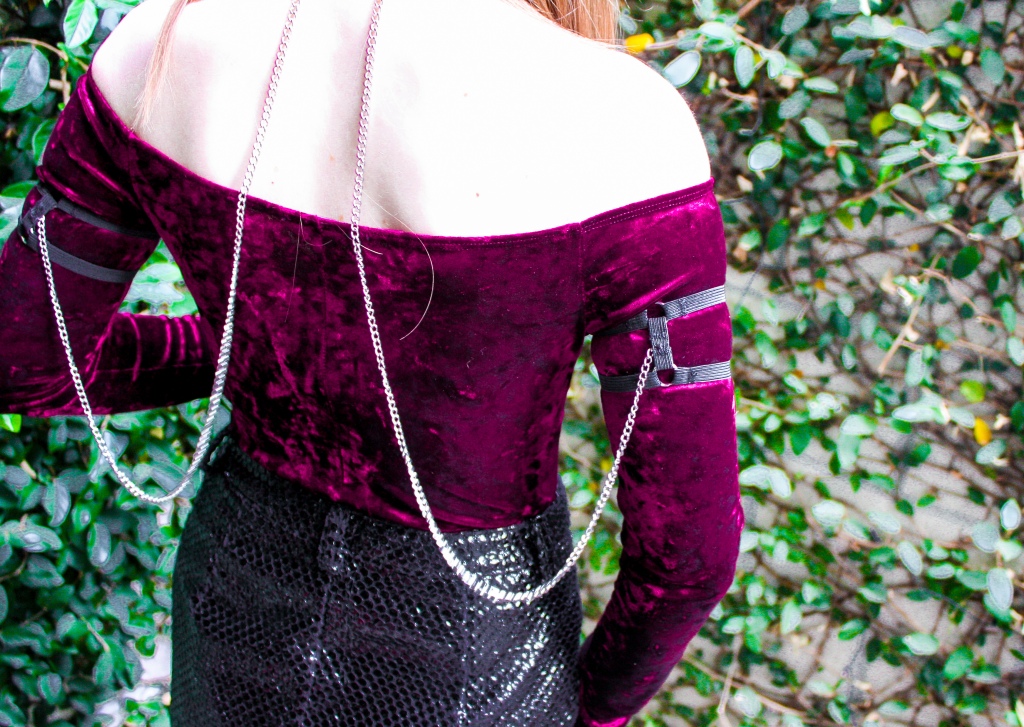
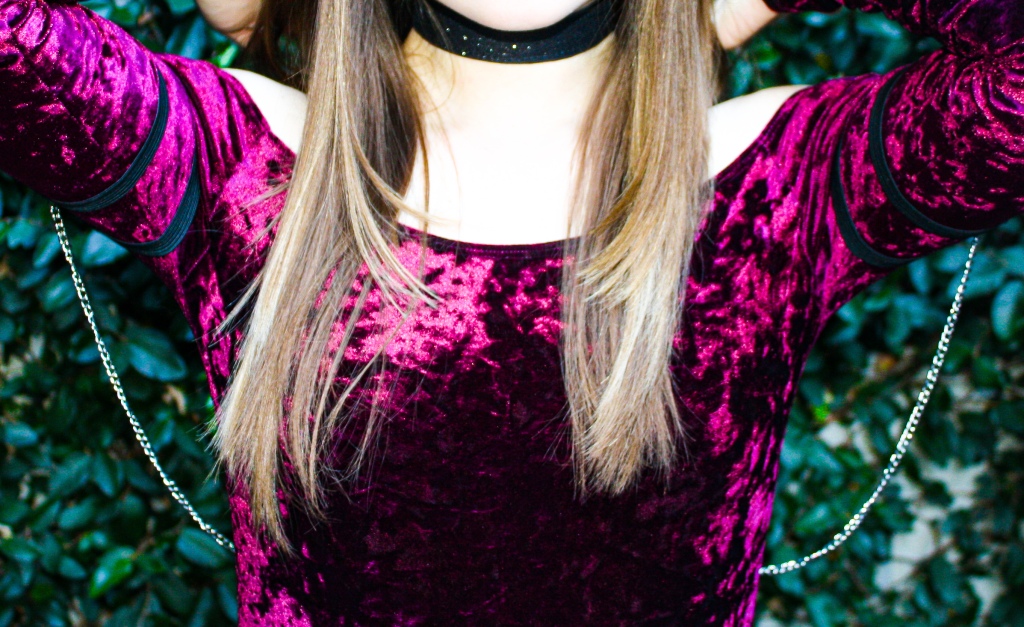
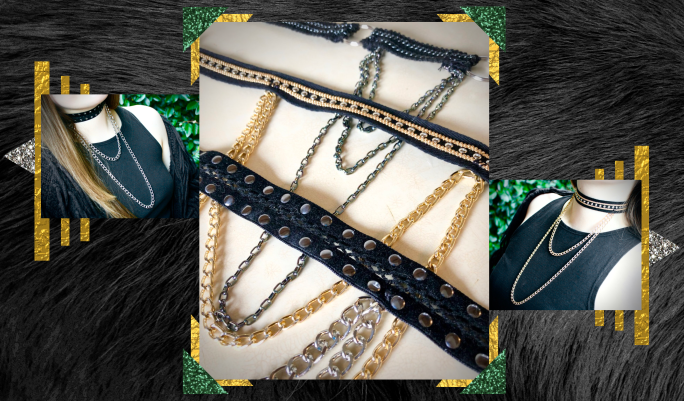
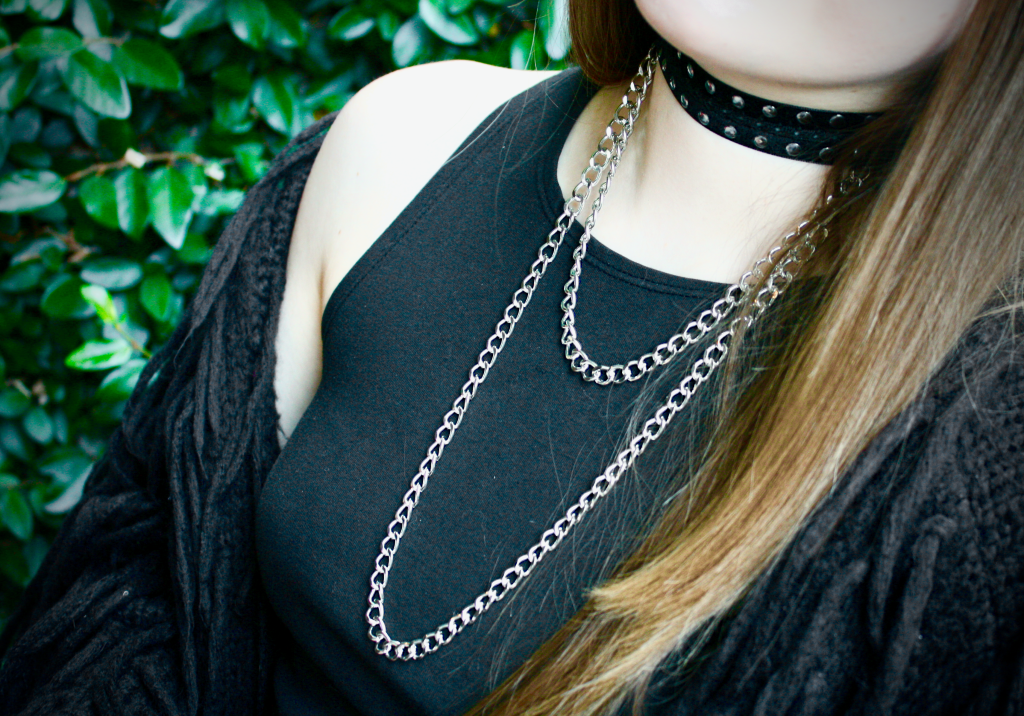
Much like our chain cape necklaces, I’m all about the subtle, industrial-chic accessories. Sure, jewelry is cool, but can it turn plain shirts, sweaters & more into whole new statement pieces? Not so much.

So this is one that truly delivers.

Another little confession time tidbit for ya: despite trying & trying (& trying & trying…), I’m part of the 0.1% who never could fully get onboard with the whole GOT obsession. BLASPHEMY some might say. Believe me, I’ve heard it. Although hype wars aside, there’s no denying some of the fashion was pretty on point.

Especially those incredibly repurposed, super thrifty, IKEA rug capes.

Snaps for you, HBO.

// WHAT YOU NEED //

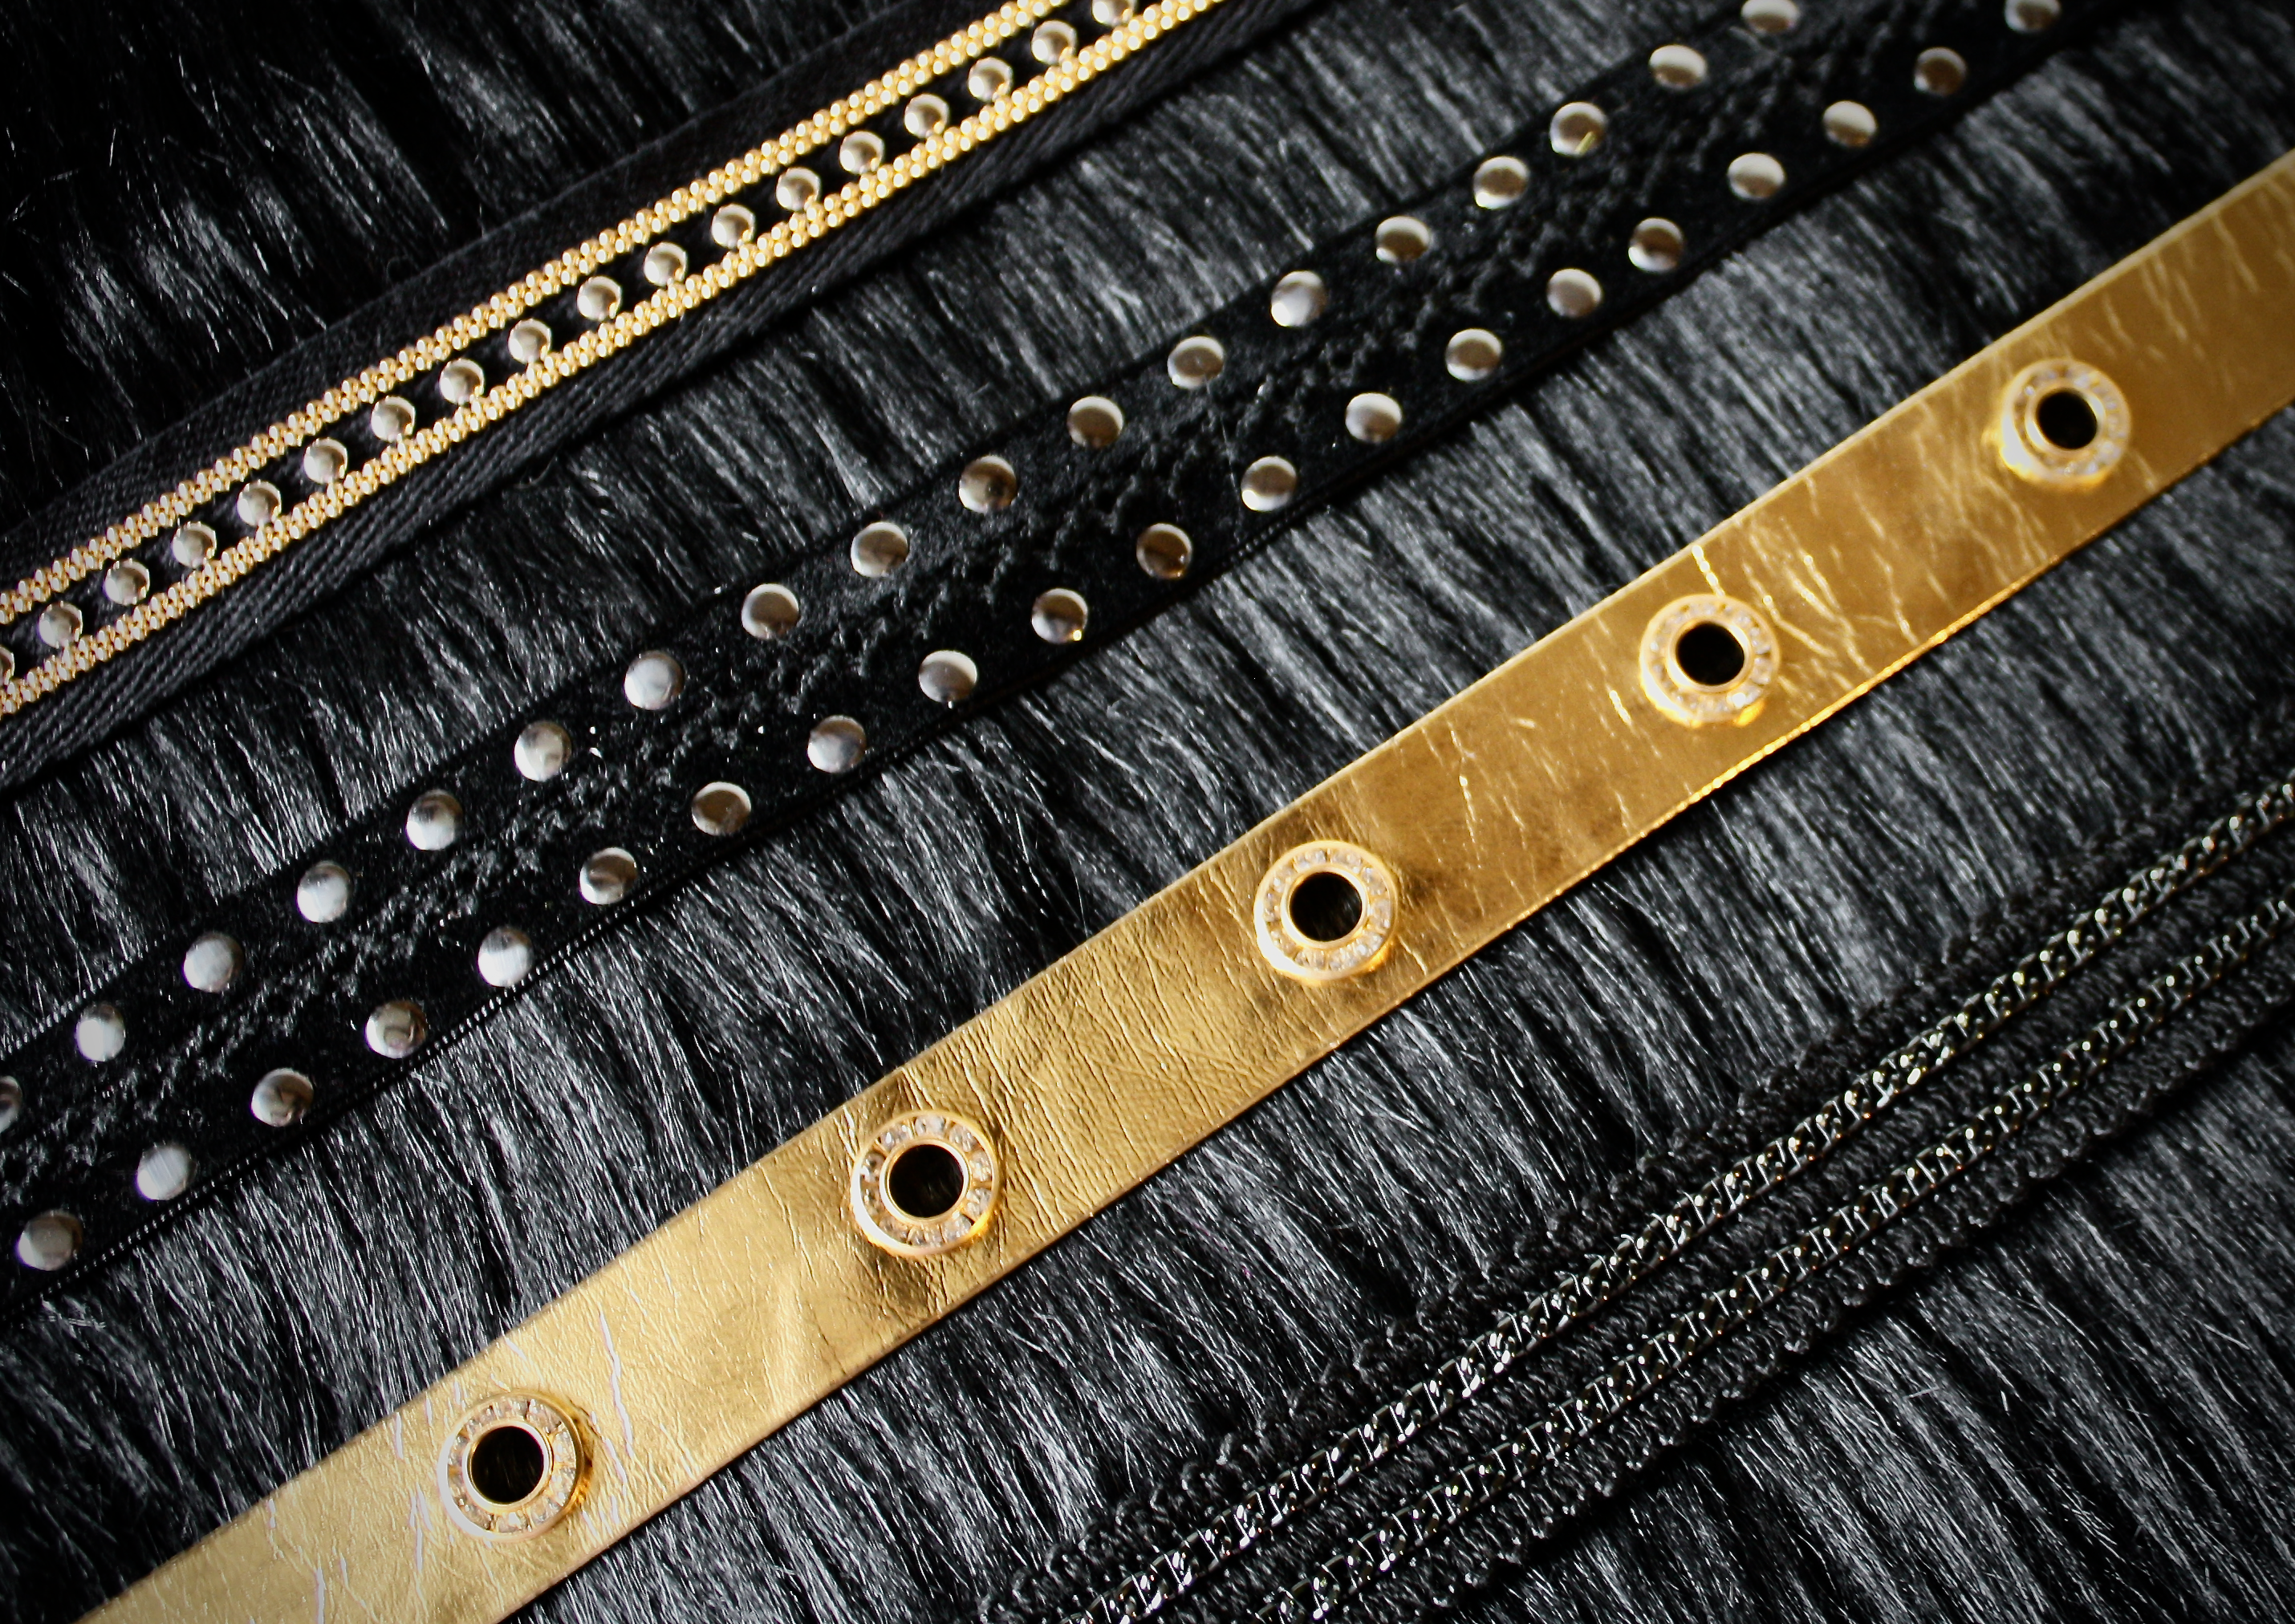
+ 1/3 yard of faux fur fabric

+ 1/3 yard of lining fabric (poly-satin works great)

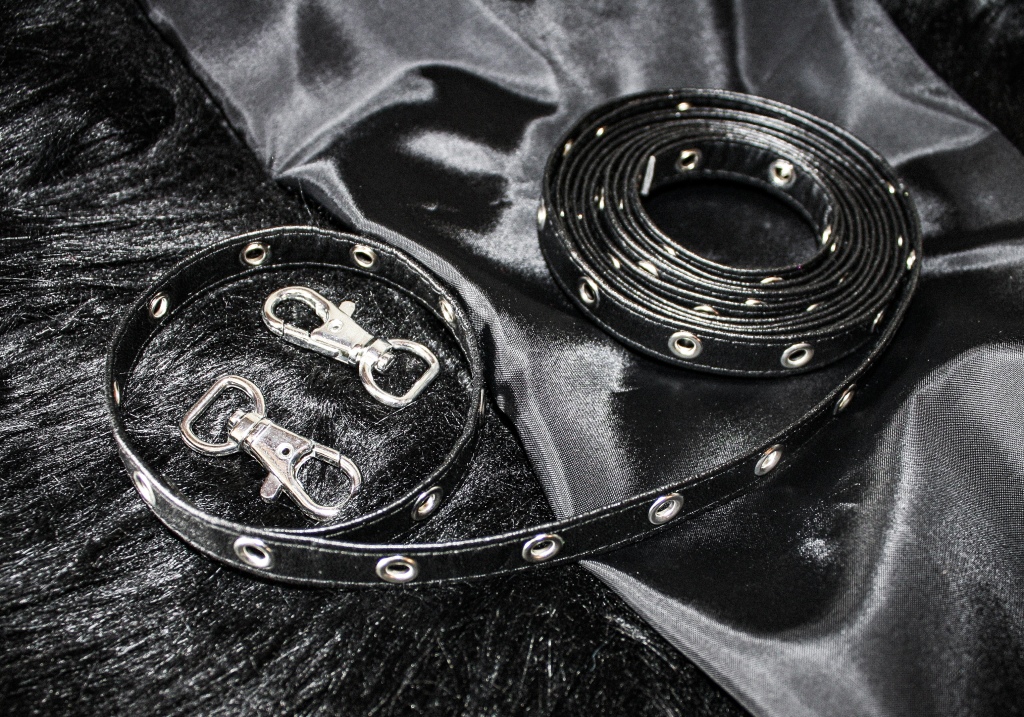
+ Two pieces of 1/2” grommet/eyelet tape, each cut 18 inches long (adjusted to your own torso measurements, if needed)

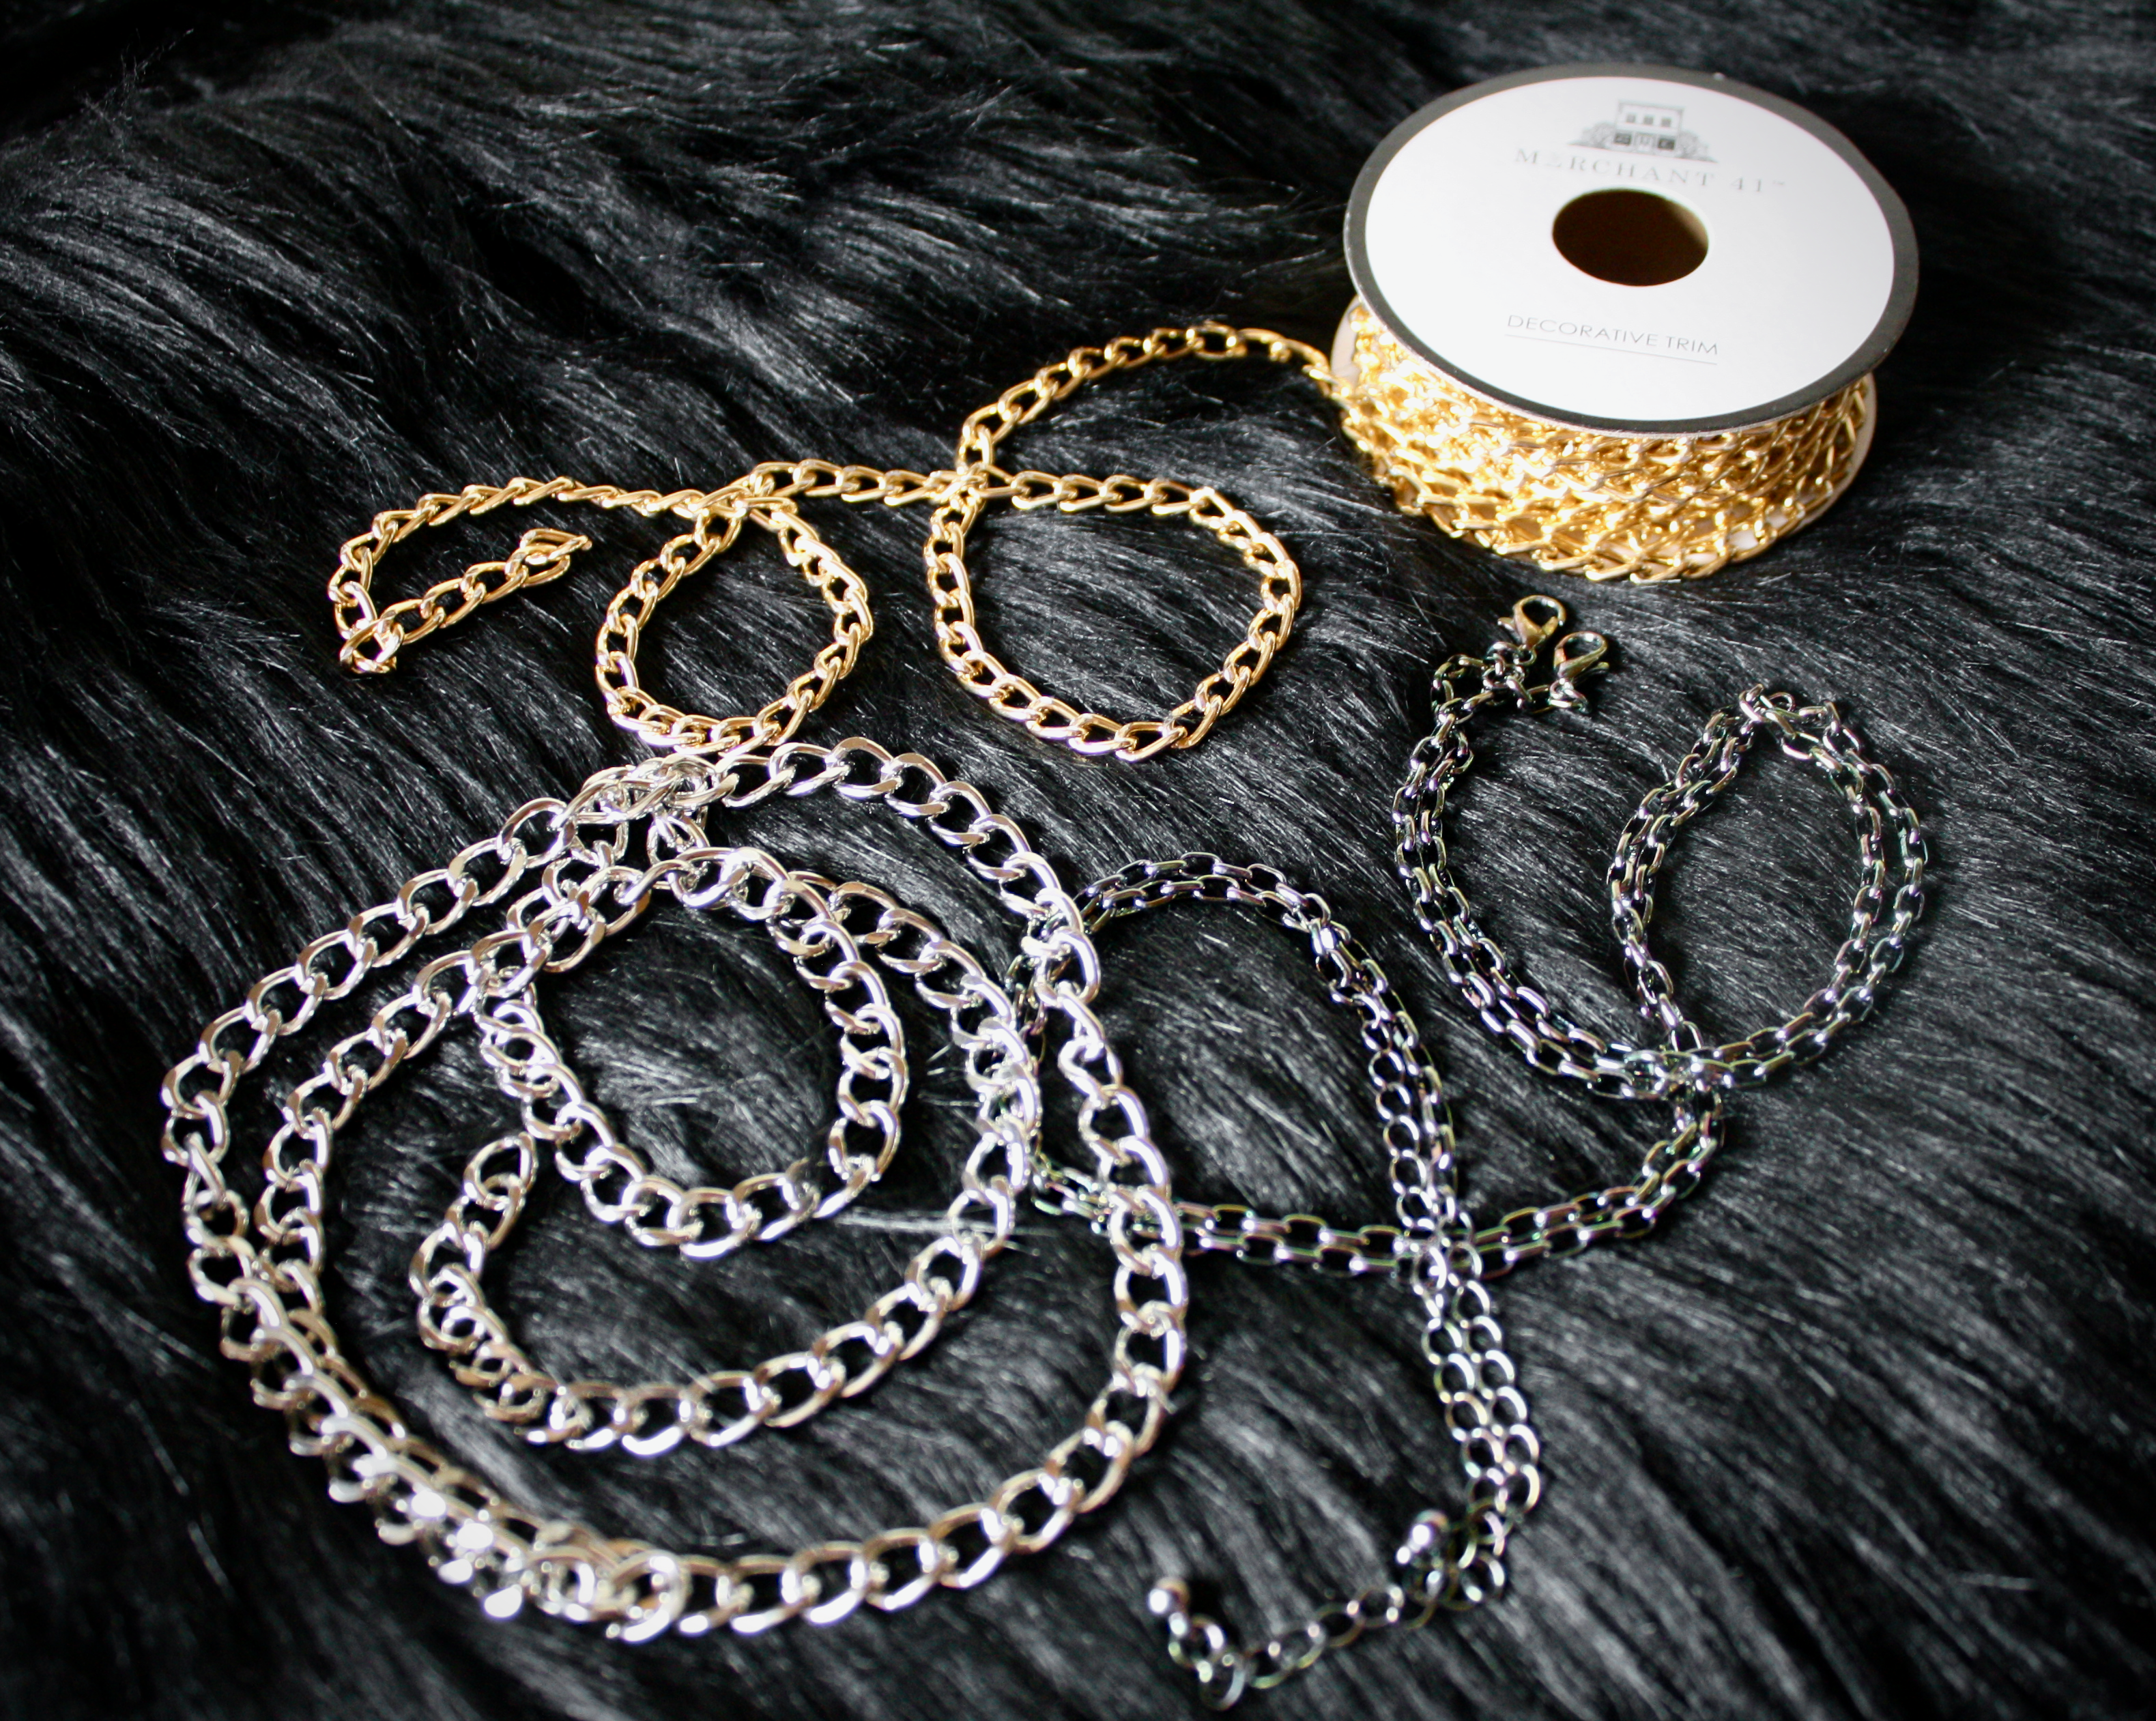
+ Two 1/2” swivel hooks & one matching D-ring

+ One 3” piece of black elastic (1/2” wide)

+ Needle & heavy-duty thread

+ Sewing pins

Black goth steampunk fabric

// STEPS //

++ Cut your faux fur into a strip approximately 40 inches long by 6.5 inches wide (NOTE: unless you’re in the market for a fur storm, push the pile to the sides as you make small snips down the middle of the split to minimize shedding).

++ Cut/round off the top corners of the fur so its final shape matches the graphic below (adjusting to your own measurements, if needed).

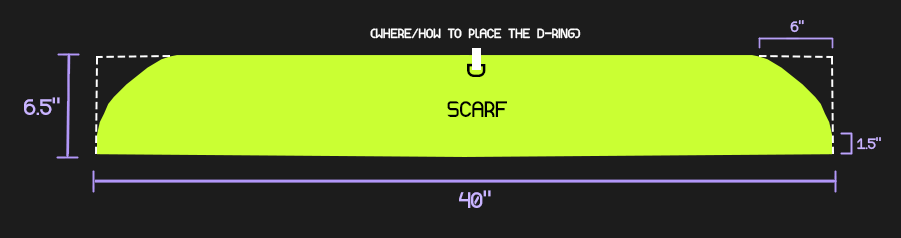
((hopefully my precious little graphic isn’t too confusing!))

++ Flip the fur over so that the wrong side is facing up. Lay the lining fabric on top & begin pinning it to the fur, leaving one to two extra inches of lining sticking out past the edges. 

++ Trim off any excess lining fabric beyond those one to two extra inches, remove the pins & flip both of your fabric pieces over so that the right sides are facing each other. 

++ Re-pin the two fabrics together & make sure to keep all faux fur strands around the edges tucked inside. That way, we can fluff it all out later, as opposed to it getting stuck inside the stitches.

++ Fold the strip of elastic in half, stick it through the D-ring & fold in half again. You should now have four layers total with the D-ring sandwiched in the middle.

++ Pin the elastic/D-ring into place (again, check out the graphic) so that it will stick out of the back once we turn the finished scarf right-side out.

++ Use a sewing machine to sew along the two long edges, leaving the curved ends un-sewn for now (this helps prevent the lining from sliding around & getting mind-numbingly messed up). Remember to keep the fur strands tucked in as you go.

++ Sew along the edge of one of the rounded ends to close it up, then flip the scarf right-side out. Ensure all looks good & if so, carefully hand-stitch the other end closed.

++ Fold one piece of the grommet tape around the swivel hook and straight stitch it into place. Clip the swivel hook onto the D-ring & put on the scarf. Follow the grommet tape (making sure it doesn’t twist) to the outer edge of one of the scarf’s ends & pin it wherever feels most comfortable to you. 

++ Straight stitch (or hand-stitch) the tape into place & repeat for the other grommet tape/swivel hook set on the other side.

Steampunk fashion scarf
DIY goth steampunk accessories
Grommet tape

Pretty please share if there’s something crazy you’ve ever repurposed into gold!

And in the meantime – stay warm, frost kittens…

xxAA

DIY CHAIN CAPE NECKLACE

Yep, you heard me right! A chain. cape. necklace.

Do tell?

Curb chain accessories

Honestly, I’m still not sure if that’s technically the best way to describe it. But basically, it’s a choker & two upper arm bands attached via chain. Like magician x medieval knight, or superhero x tetherball pole – super fun, right?!

When it comes to metal, typically you think jewelry, purses, maybe a Spencer’s wallet circa 2006 if we dare flash back that far. Although the truth is, chain accessories can go SO much further than that. And not to mention, look super chic while at it.

Think paired with sleeveless top or dress to make make for a Cleopatra-inspired situation, or added to your favorite fall/winter staples for a more subtle, industrial-glam touch. Either way, there’s no denying it creates an interesting vibe to look at – plus, turns any tired-feeling outfit totally on its head.

So what more could ya want?

// WHAT YOU NEED //

+ Black elastic (1/2 inch wide)

+ 4 jump rings (15 mm)

+ Your choice of sturdy fabric for the choker

+ Curb chain (60 inches long)

+ One hook & eye closure

+ Needle & heavy-duty thread

+ Sewing pins

// STEPS //

THE ARM BANDS

++ Measure your upper arm & cut four strips of black elastic to length + one extra inch.

++ Cut two additional pieces of black elastic approximately 2 inches long.

++ Take the four elastic pieces you cut for the upper arm bands & pin the ends of each piece around one jump ring to create four individual bands.

++ Stack two of the individual bands so that the jump rings line up & pin one of the 2-inch elastic pieces around the two jump rings to connect them. Do the same for the other set.

++ Use a zig-zag stitch to secure each folded over section of elastic to create two finished upper arm bands.

THE CHOKER

++ Measure your neck & cut a 2.5 inch-wide strip of your choker fabric to length + one extra inch for the seam allowance.

++ Fold your strip of fabric in half the long way (AKA hot dog style) so that the right sides are together & pin it.

++ Sew a straight stitch across the width of the fabric at each end & flip the strip right sides out.

++ Make sure all of the extra fabric is tucked in & sew a straight topstitch along the right side of the fabric to create a clean-edged choker band. Then, topstitch the other side to finish it off.

++ Finally, hand-sew a hook & eye to each end & double-check that it still fits your neck.

TO FINISH

++ Cut your curb chain in half to make two 30-inch pieces & hand-sew one end of one chain to the inside of the choker left of the hook & eye, then one end of the other chain to the right of the hook & eye.

++ Take the other ends of each chain and hand-sew one to each arm band. Done & done!

goth girl alt fashion
DIY goth accessories
Crushed velvet grunge fashion

xxAA

THE EASIEST DIY CHOKERS EVER

Does anyone else have a weird relationship with jewelry?

I mean, it’s cool. It’s classic. Almost all of the older women in your life are super into it. But there’s still just something about it that’s always been a little tricky, if you ask me.

The cheap stuff these days isn’t really all that cheap. Finding the right piece can take a lifetime. AND when it comes to traveling, it’s hard not to worry that it will all meet an unfortunate demise of pulverization in your suitcase! Regardless if it’s the TSA’s “fault” or not…

But – there’s no denying it IS a killer way to elevate almost any outfit. So that’s what has always made me want to find a way to make it work.

Enter: TRIM. Something you may or may not be familiar with, although get ready, ‘cause it’s about to become your new best friend! Mainly due to the fact it’s inexpensive, customizable AND totally manageable for any DIYer – no matter how well you do (or don’t) know your way around a needle and thread.

Amazing, right?

Another perk is that by using trim, you can design the necklace however intricate or basic you please. Break it up with additional jump rings to create a cool look – or keep it super simple yet chic and edgy with the choker alone. But either way, you can throw it around without having to think t w i c e.

Seriously! Suitcase, gym bag, purse—it’s all NO match for this mighty accessorizing hack.

So let’s jump into it!

// WHAT YOU NEED //

+ A piece of trim

+ Curb chain

+ Needle & thread

+ Your choice of closure (I use a hook & eye)

// STEPS //

++ Measure the amount of trim you need based on your neck size, leaving 1/4 to 1/2 inch extra on each end. Remember, you want it to fit like a choker without, you know, actually choking you.

++ Take one end of the trim, fold the extra section back and sew it down to create a neat, fray-free edge. If your trim has a lot of metal embellishment like mine, you’ll probably need to hand sew it; however, if you want to use a sewing machine to zig-zag stitch it instead, be my guest!

++ Repeat on the other end, then double check that the finished length still comfortably fits your neck (i.e. didn’t accidentally get shortened too much in the process).

++ Take your choice of closure and hand sew a piece to each end.

++ Figure out how you want to position the curb chain, then hand-sew each end of it onto the back of the trim (but not too close to the bottom edge or else you run the risk of it sagging).

++ Voila! Enjoy your super-cute, new favorite accessory. 

// PROTIPS //

++ Whenever hand sewing things like this, I almost always opt for button/craft or upholstery thread instead of regular all-purpose, because it has that nice extra dose of durability. 

++ I personally like to use hook & eyes for necklaces because they feel the most secure to me, but you can totally use whatever works best for you! Snaps, velcro – even a safety pin can do the trick if sewing REALLY isn’t your forte & you want to spare the band-aids. 

++ All in all, the most important thing is to keep measuring as you go, juuust to make sure it doesn’t end up being too small. If you want to be safe, always lean toward keeping the trim slightly longer than you need, since you can always stitch together a gathered section of it in the back to tighten the necklace at the very end. No one will ever see it – and your secret will always be safe with us.

Let us know how it turns out for you! 

xxAA