DIY CHAIN CAPE NECKLACE

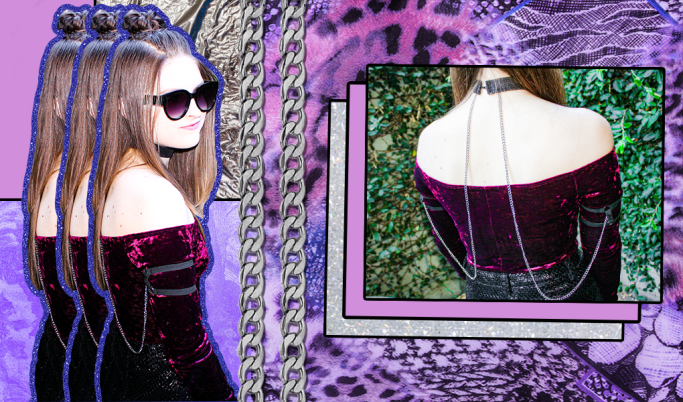
Yep, you heard me right! A chain. cape. necklace.

Do tell?

Curb chain accessories

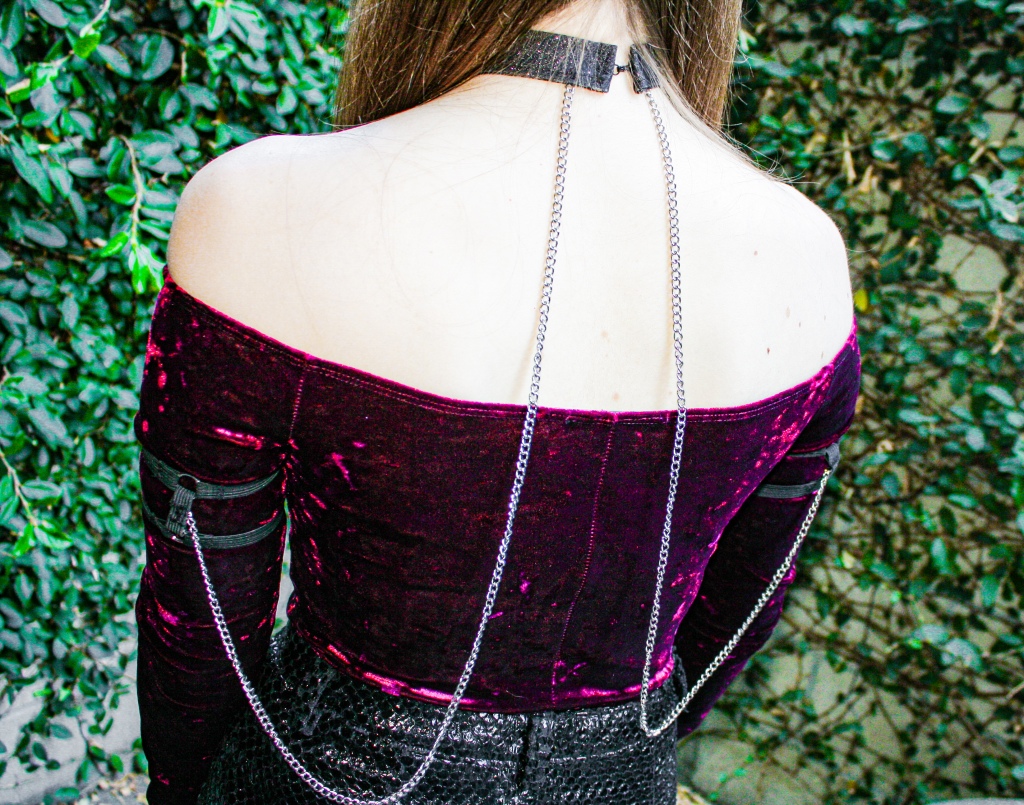
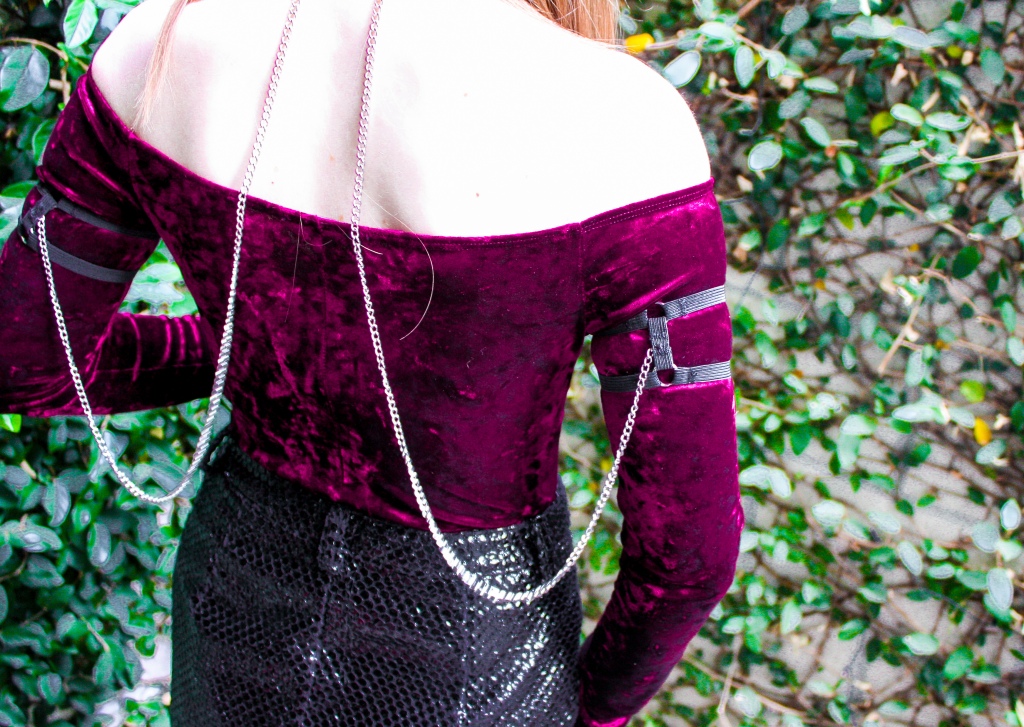
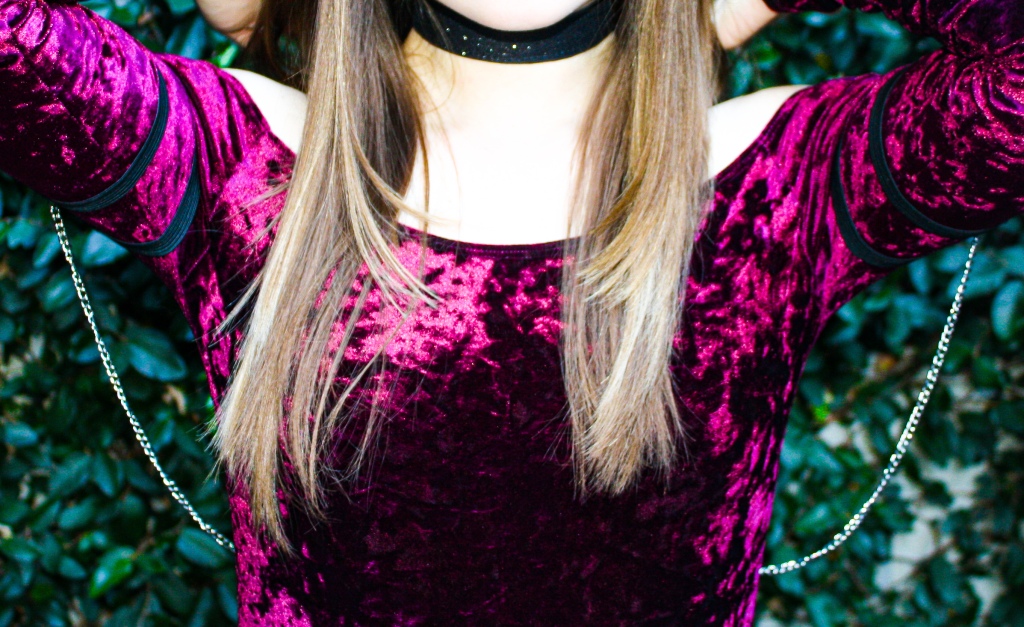
Honestly, I’m still not sure if that’s technically the best way to describe it. But basically, it’s a choker & two upper arm bands attached via chain. Like magician x medieval knight, or superhero x tetherball pole – super fun, right?!

When it comes to metal, typically you think jewelry, purses, maybe a Spencer’s wallet circa 2006 if we dare flash back that far. Although the truth is, chain accessories can go SO much further than that. And not to mention, look super chic while at it.

Think paired with sleeveless top or dress to make make for a Cleopatra-inspired situation, or added to your favorite fall/winter staples for a more subtle, industrial-glam touch. Either way, there’s no denying it creates an interesting vibe to look at – plus, turns any tired-feeling outfit totally on its head.

So what more could ya want?

// WHAT YOU NEED //

+ Black elastic (1/2 inch wide)

+ 4 jump rings (15 mm)

+ Your choice of sturdy fabric for the choker

+ Curb chain (60 inches long)

+ One hook & eye closure

+ Needle & heavy-duty thread

+ Sewing pins

// STEPS //

THE ARM BANDS

++ Measure your upper arm & cut four strips of black elastic to length + one extra inch.

++ Cut two additional pieces of black elastic approximately 2 inches long.

++ Take the four elastic pieces you cut for the upper arm bands & pin the ends of each piece around one jump ring to create four individual bands.

++ Stack two of the individual bands so that the jump rings line up & pin one of the 2-inch elastic pieces around the two jump rings to connect them. Do the same for the other set.

++ Use a zig-zag stitch to secure each folded over section of elastic to create two finished upper arm bands.

THE CHOKER

++ Measure your neck & cut a 2.5 inch-wide strip of your choker fabric to length + one extra inch for the seam allowance.

++ Fold your strip of fabric in half the long way (AKA hot dog style) so that the right sides are together & pin it.

++ Sew a straight stitch across the width of the fabric at each end & flip the strip right sides out.

++ Make sure all of the extra fabric is tucked in & sew a straight topstitch along the right side of the fabric to create a clean-edged choker band. Then, topstitch the other side to finish it off.

++ Finally, hand-sew a hook & eye to each end & double-check that it still fits your neck.

TO FINISH

++ Cut your curb chain in half to make two 30-inch pieces & hand-sew one end of one chain to the inside of the choker left of the hook & eye, then one end of the other chain to the right of the hook & eye.

++ Take the other ends of each chain and hand-sew one to each arm band. Done & done!

goth girl alt fashion
DIY goth accessories
Crushed velvet grunge fashion

xxAA

FALL’S MOST UNEXPECTED ACCESSORY: DIY GLAM BANDANAS

Ah, bandanas. Something you probably haven’t thought about since that godawful country western-themed dance in middle school – unless you’re a roadie for The Grateful Dead.

BUT now that fall temps are starting to arrive and we can actually stand to wear something around our necks without dripping in sweat, we’re proud to introduce: the glam-dana!

A great way to transition into fall, this edgy twist on the classic kerchief might just be our new obsession. And for good reason! After all…

–Basic bandanas are cheap as hell. Like, 99 cents cheap.

–They come in a surprisingly huge array of colors & prints.

–The fabric is super easy to work with (& also wash).

–You can style them in so many different ways (I’m talking from tanks to turtlenecks).

–AND they’re totally customizable to whatever vibe you’re feeling – and/or supplies you have laying around. 

Seriously, beads, trim, studs, spikes, buttons, sequins – even dye or paint if you really want to get creative. It’s one of those projects that you can invest however much (or little) time you’d like, plus truly make all your own.

So let’s dive in!

// WHAT YOU NEED //

+ A bandana

+ Bead needle & thread (double layered & knotted at the end)

+ Regular needle & thread (double layered & knotted at the end)

+ Beads (I used seed)

+ Fringe

+ Your choice of chain & studs (or whatever else you want to use for embellishment)

// STEPS //

++ First things first: rescue that bandana with an iron. You won’t get ~all~ of the creases out, but give it a valiant effort.

++ Fold the bandana in half diagonally and choose which side you want to be your main (luckily we only have to decorate the half that’s going to show).

BEADING

++ If you want to bead, that’s the first detail you should knock out (if not, just skip to the next section).

++ Once you figure out which areas you want to accent with beads, take your threaded bead needle and make your first stitch. Pull the needle though the fabric so the knot is on the non-visible side and sew a few tiny stitches, just to secure the thread. 

++ Add your beads two to three at a time onto the needle and pull them all the way down the thread so that they’re touching the fabric. Lay them down along where you want them to sit, and pull the needle down through the fabric right after the last bead to sew them into place.

++ Pull your needle back up about two to three bead’s length away from the last sewn-in bead (same premise as a back stitch), thread more beads onto the needle, put your needle back up against the last sewn-in bead and pull it down through the fabric. At this point, you should see all of the sewn beads starting to form a line.

++ Stitch by stitch, continue the beaded detail. Your S.O. might look at you like you’re a psycho for wanting to bead all of those leopard spots – but it’s totally worth it! I promise. 

OTHER EMBELLISHING

++ Measure & cut enough fringe to line the edges. Sew it on by hand or with a machine.

++ Measure, cut & hand-sew any additional decorative trim, like curb chain. 

++ Finish attaching any other final details, such as light-weight studs — and BAM! There you have a beautifully glam bandana.

// PROTIPS //

++ If you choose to bead, note that beading needles and regular sewing needles are different. Beading needles are much longer and thinner in order to go through the teeny tiny seed beads – plus the world’s worst to thread. You also can’t use thicker thread with beading needles because it won’t feed through the eye, so go with one that’s thin yet durable.

++ When beading straighter designs, you can sew more beads at a time. For curvier details that need greater accuracy (i.e. our beautiful leopard spots) you have to stick with one to three beads at a time. 

++ It’s easiest to dump your beads into a shallow container and stick your needle into the pile to catch them instead of hand-threading each bead onto the needle.

++ When hand sewing any other details onto your presentation side of the bandana, also be careful not to accidentally sew the two sides together! Speaking as someone who this mistake the first time…ugh.

Infinity scarves, don’t say we didn’t warn you. Because this chic, post-summer staple is most def here to stay.

Let us know how they turn out for you!

xxAA