

Whenever it comes to the holidays, I’m all about putting new spins on things. Instead of kelly green, let’s opt for emerald. Swap Crayola red for ruby. Cartoon snowflakes & creepy Santa prints? I’ll take metallics & faux fur ANY day.
But when we’re talking about infusing tradition with our own taste, there’s always room (& by room I mean a need) for some spookalicious action as well. Which is why last year as K & I pined over the classic struggle of how to decorate an apartment ((not to mention, with two devious kittens in the mix, too)), we hit a road block.
UNTIL – the solution came…
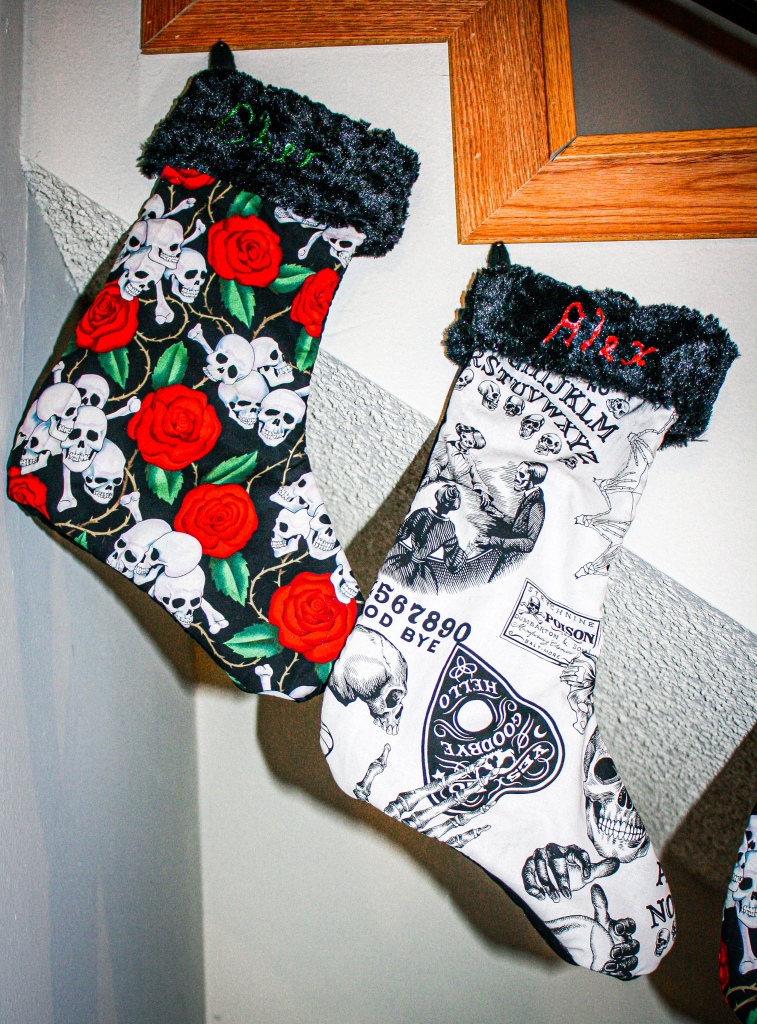
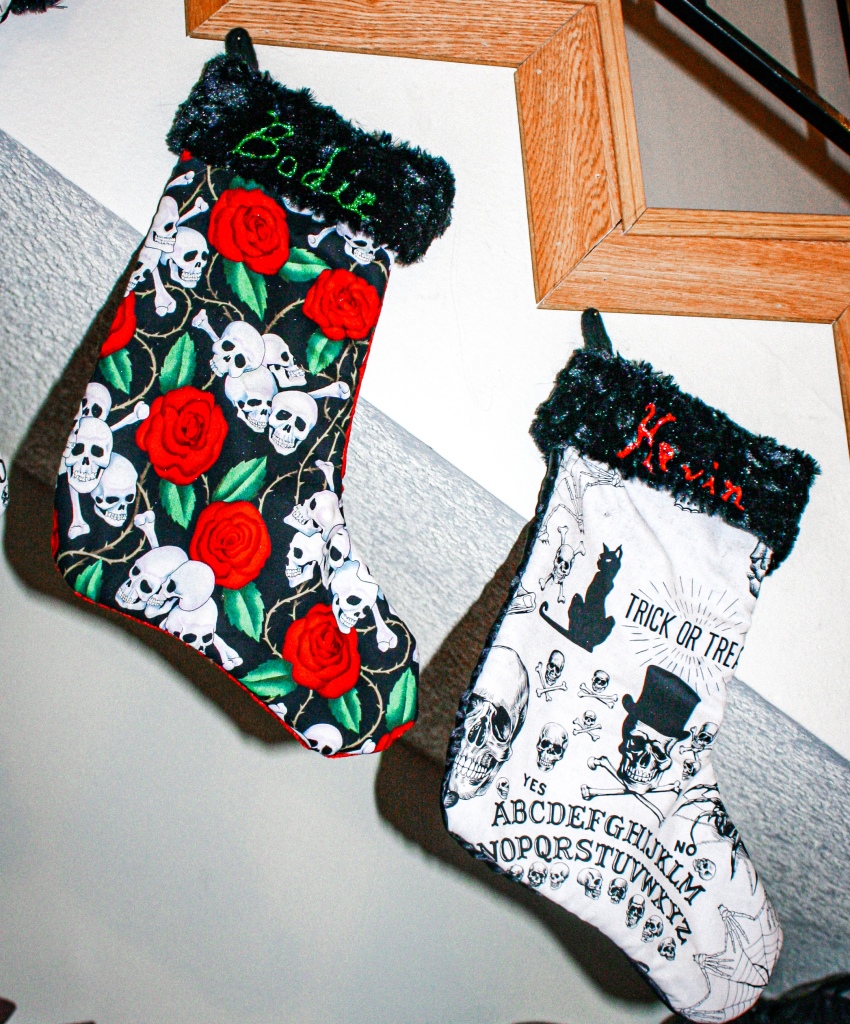
Stockings! Specifically, made out of the spooktacularly festive fabric we recently saw at one of our fave local horror stores.
So from there, the creation began. Never had I thought about sewing stockings, but hey, it’s just a giant sock, right? How hard could it really be? And I have to say, it felt like they turned out pretttty freaking well.
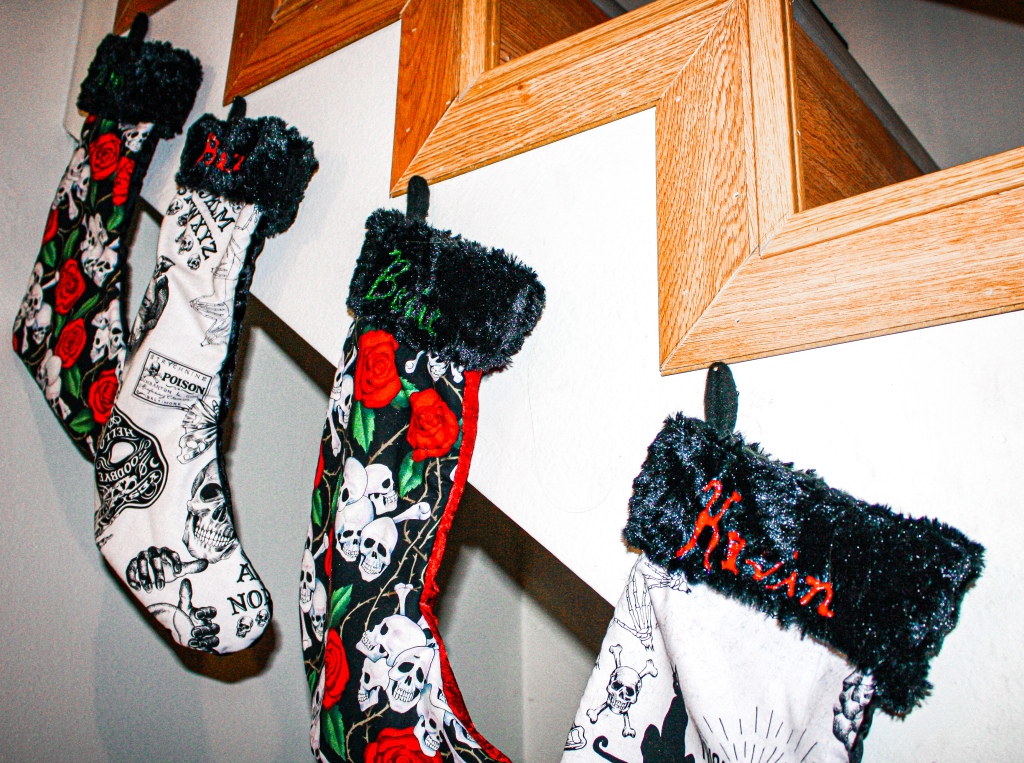
So kiss the tired, ’80s mantles goodbye! And say hello to the creepy-cute holiday upgrade you never knew you needed…
// WHAT YOU NEED //
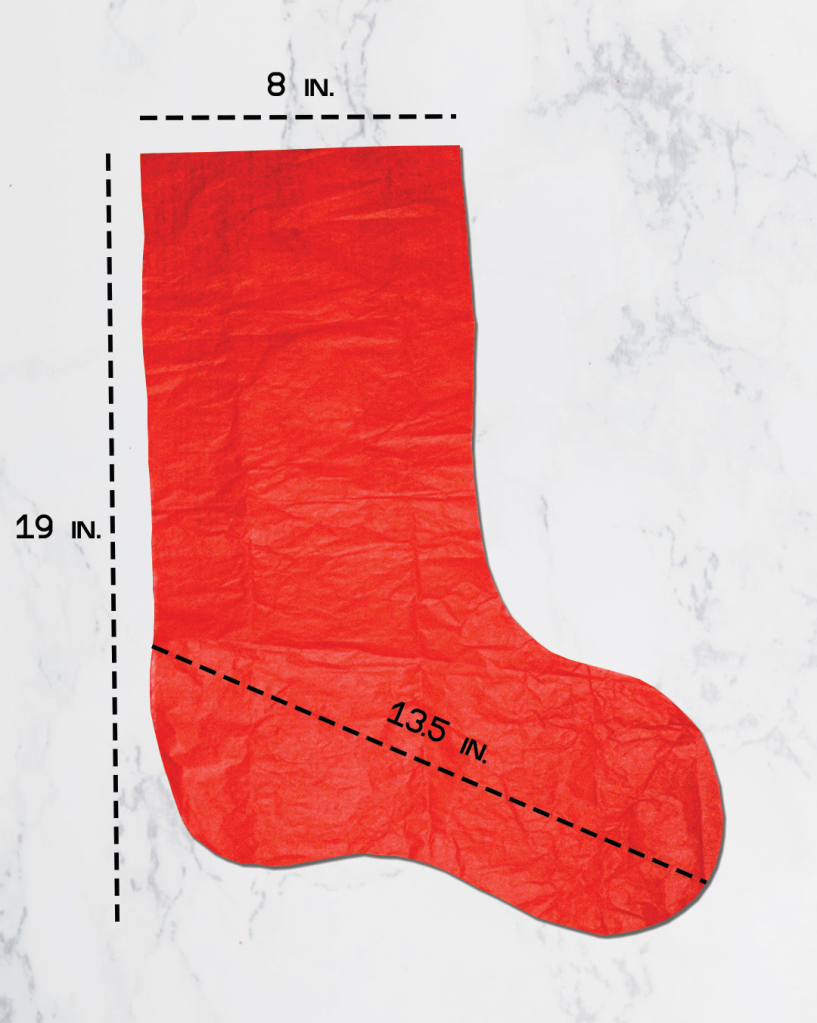
+ 1 sheet, tissue paper
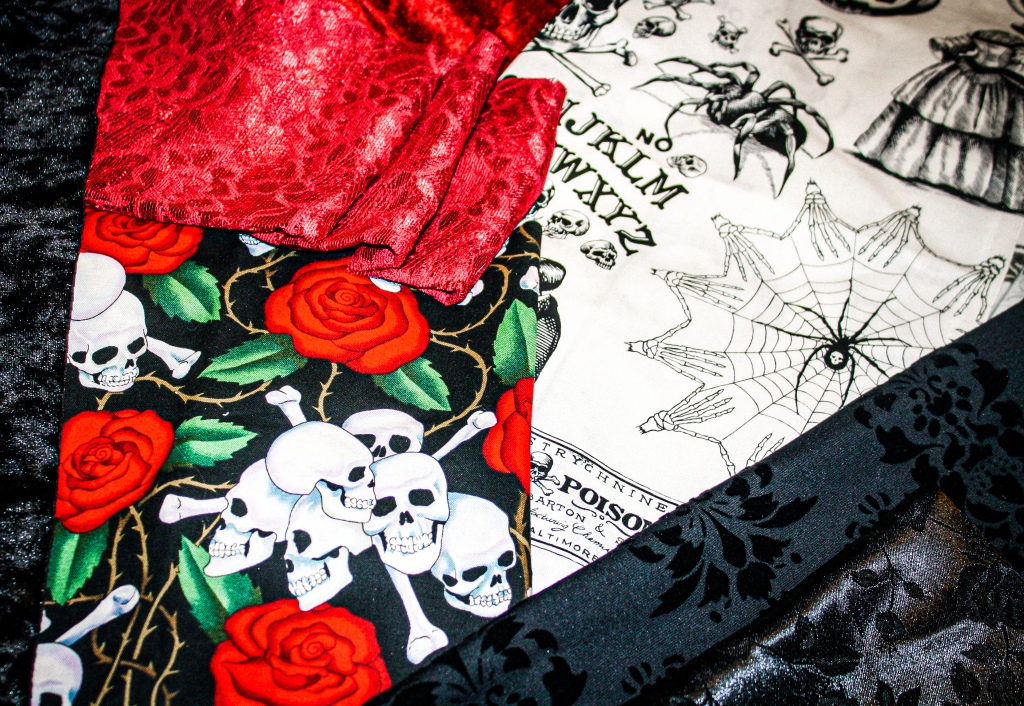
+ 1/2 yard, spooky outer fabric
+ 1/2 yard, lining fabric (minky or a short-piled faux fur looks best IMO!)
+ A scrap of ribbon or other thick fabric (for the hanger)
+ A needle & heavy-duty thread
+ Puff paint pens (optional)
// STEPS //
++ Draw your main stocking shape onto a piece of tissue paper. I used the measurements below, but feel free to customize for whatever size you like/need!
++ Cut out your stocking pattern & fold the outer fabric in half such that the right-sides are facing IN; & the lining fabric such that the right-sides are facing OUT (a little confusing, but it’ll all make sense in the end).
++ Pin the pattern onto your outer fabric & cut, so that you have two, identical stocking shapes. Repeat for the lining fabric.
++ Take your two pieces of outer fabric & stack them with the right-sides still facing IN. Then, take your two pieces of lining fabric (right-sides still facing OUT) & sandwich them around the outer fabrics. Pin the fabric stack together – which should look like it’s totally inside out.
++ Sew around the perimeter of the stocking using a zig-zag stitch, leaving about 1/4 inch of seam allowance.
++ Flip the stocking right-side out (so the outer fabrics should now be on the outside with lining fabrics on the inside) & fold the top down to expose however much of the fuzzy fabric you’d like.
++ Cut & fold your ribbon/thick fabric into a sturdy loop, then stitch it onto the top corner of the stocking to create a hanger.
++ And finally, if you want to puff-paint names onto each for an extra personal touch, feel free! Or else just hang & admire a darkly festive job well done.
What are some of your favorite twists on tradition?
xxAA
